[0052]It is noted that the aluminum alloy constituting each of the above-described core material, filler materials and intermediate layer material may include Mg, Ca and other inevitable impurity elements as far as they do not affect the properties of the brazing sheet. In that case, if the content of each of these elements is not more than 0.05% and the total content of the elements is not more than 0.15%, the elements do not significantly affect the effects of the invention.
[0054]Controlling the temper contributes to improvement of brazeability, and the aluminum alloy brazing sheet according to the invention has a temper represented by HXY (wherein X is 1 or 2, and Y is a natural number from 2 to 6). The brazing sheet having the above-described temper can be obtained, as known well, by the conventional tempering or thermal refining operation. The brazing sheet may be the one subjected only to work hardening (without final annealing) or the one subjected to an appropriate degree of annealing (final annealing) after the work hardening. In the brazing sheet whose temper is O, H11 or H21, erosion by the filler material is caused at a portion of the brazing sheet which does not have a sufficient remaining strain after its formation, so that it is difficult to obtain desired brazeability. In the brazing sheet whose temper is H17, H18, H19, H27, H28 or H29, a driving force for recrystallization during heating for brazing is excessively high, so that recrystallized grains in the core material are fine and erosion by the filler material is caused, resulting in poor brazeability. It is noted that the meaning of the temper designations used here is in conformity with the definition of JIS-H-0001.
[0056]The amount of solid-solubilized solute atoms in the aluminum alloy constituting a core material portion of the aluminum alloy brazing sheet according to the invention has a correlation with the electric resistivity. For this reason, in the invention, the amount of solid-solubilized solute atoms is controlled such that the electric resistivity of the core material portion at room temperature is within a range of 31-50nΩm, so that improvement of formability and brazeability is achieved. The above-indicated electric resistivity is realized by controlling, for example, the alloy composition of the core material, and the rate of strain in the hot clad-rolling process described later. In the case where the electric resistivity at room temperature is less than 31nΩm, the amount of solid-solubilized solute atoms is too small, so that the n-value is too low and desirable formability cannot be obtained. On the other hand, in the case where the electric resistivity at room temperature is more than 50nΩm, the amount of solid-solubilized solute atoms is excessively large, so that the core material fails to be subjected to recrystallization during heating for brazing and suffers from erosion by the filler material, resulting in difficulty to achieve desirable brazeability. The electric resistivity of the core material portion at room temperature is preferably 31-45nΩm, and more preferably 31-40nΩm.
[0057]Furthermore, to examine a state of dispersion of fine second phase particles at the core material portion of the brazing sheet, an area ratio of the second phase particles having a circle equivalent diameter of not more than 0.5 μm is defined as f (%), an average circle equivalent diameter of the second phase particles is defined as r (μm), and the dispersion ratio of the second phase particles is defined as f / r. According to the definitions, the dispersion ratio of the second phase particles in the core material portion is controlled to be within a range of 5-50%·μm−1, so as to contribute to improvement of formability and brazeability. The above-indicated dispersion ratio is realized by controlling, for example, the alloy composition of the core material and the highest temperature in the hot clad-rolling process described later. In the case where the dispersion ratio of the second phase particles is less than 5%·μm−1, a force to prevent a movement of a recrystallized grain boundary during heating for brazing is weak, so that the recrystallized grains in the core material portion are fine, and erosion by the filler material is caused, resulting in poor brazeability. On the other hand, in the case where the dispersion ratio of the second phase particles is more than 50%·μm−1, lattice defects introduced by plastic deformation in the hot clad-rolling process form microbands so that the n-value is small, resulting in poor formability. The dispersion ratio of the second phase particles in the core material portion is preferably 5-40%·μm−1, and more preferably 5-30%·μm−1.
[0059]The work hardening exponent (n-value) contributes to improvement of formability, and varies depending on the amount of solid-solubilized solute elements in the core material and the state of dispersion of the fine second phase particles in the core material. Formability can be improved by controlling the work hardening exponent n-value, where a nominal strain in a uniaxial punch stretch forming test is within a range of 1%-2%, such that the n-value is not less than 0.010. In the case where the n-value is less than 0.010, the lattice defects introduced by the plastic deformation are not distributed uniformly, so that a degree of flatness of the rolled sheet is low, and sufficient formability cannot be obtained. The work hardening exponent n-value where the nominal strain is within the range of 1%-2% is preferably not less than 0.020, and more preferably not less than 0.030.
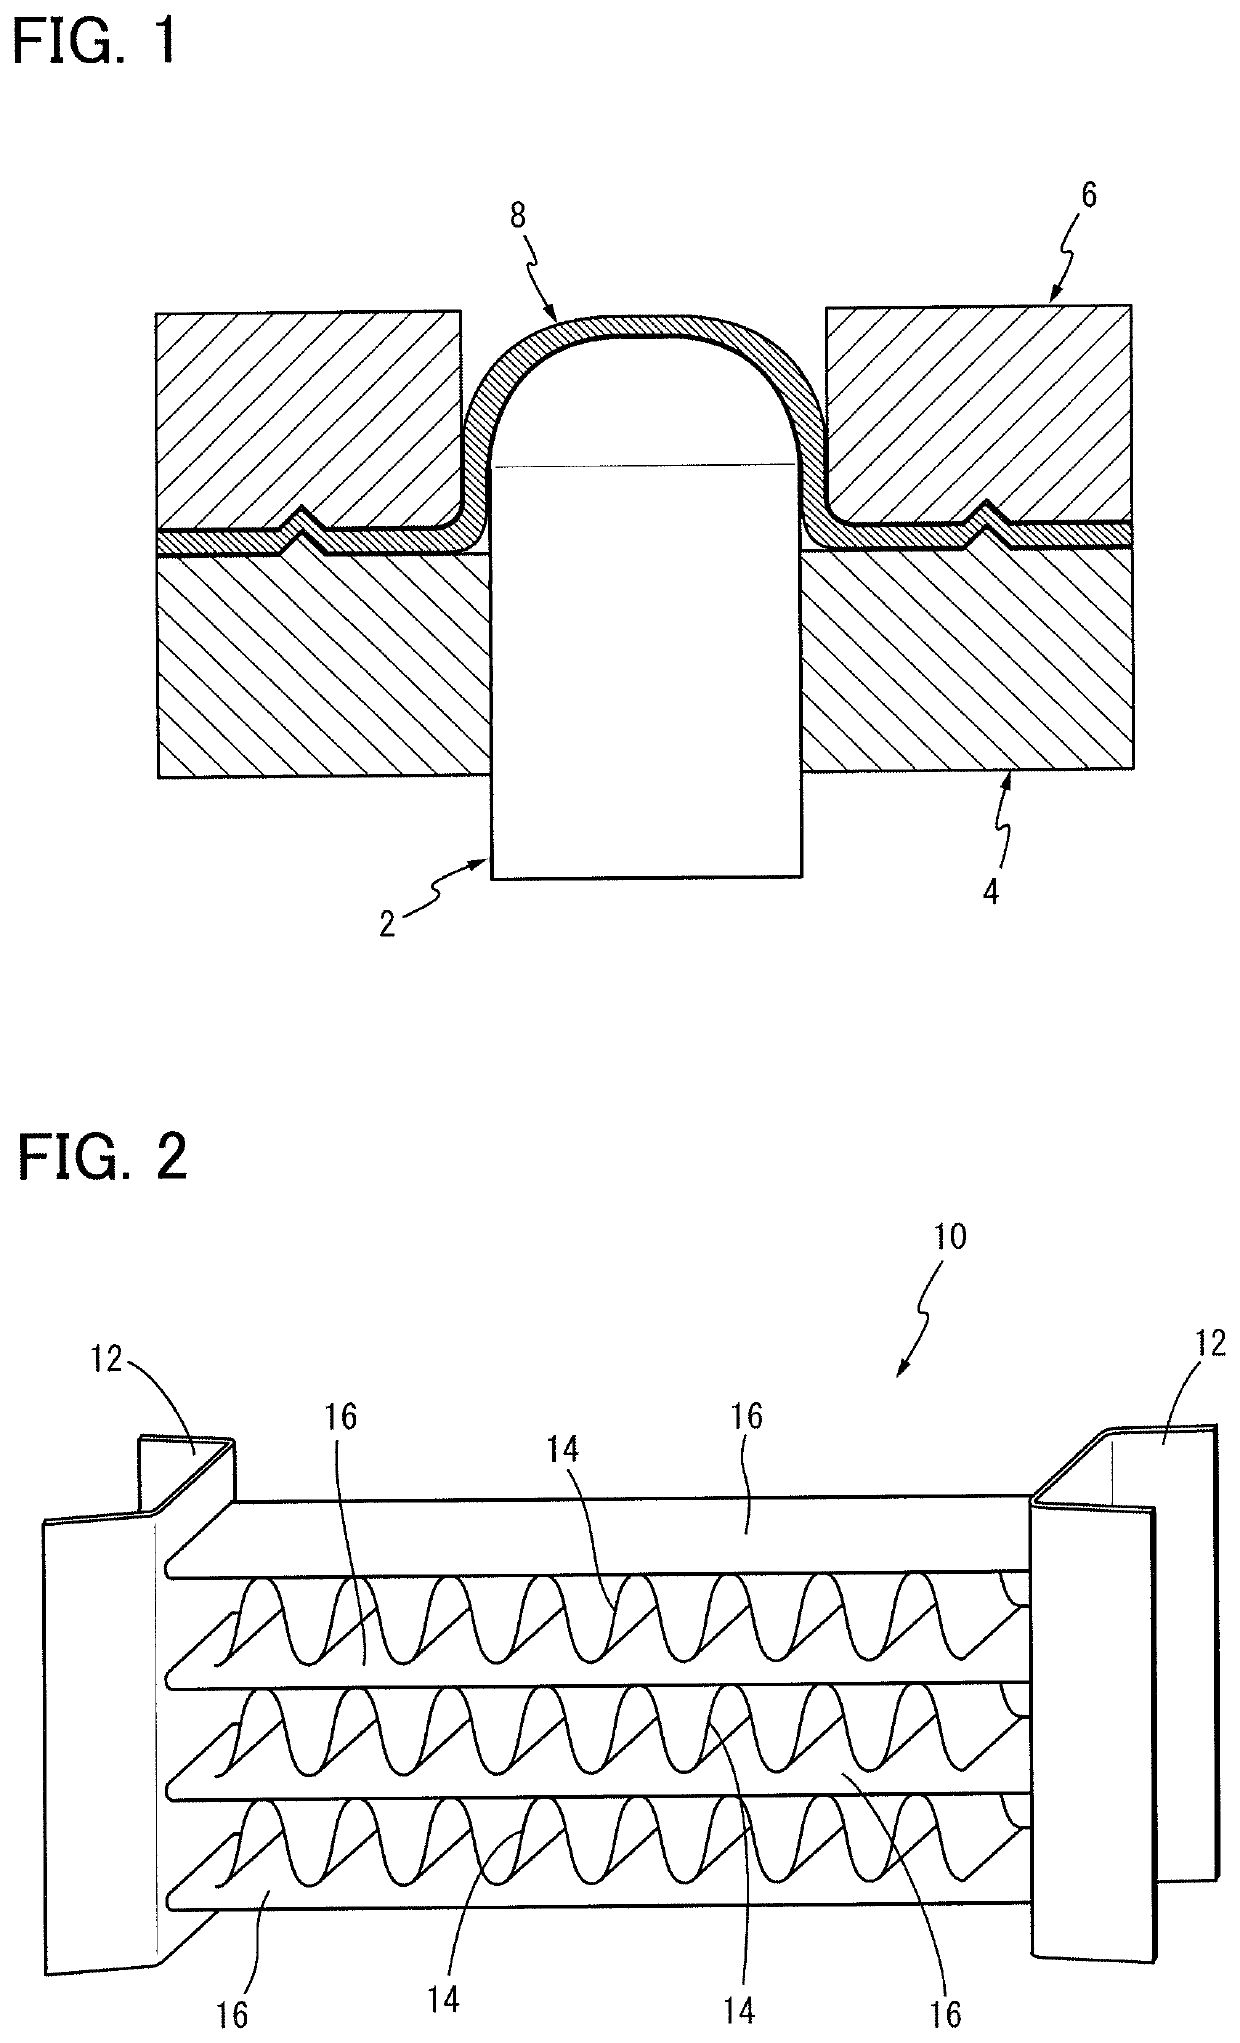
[0060]Furthermore, in the invention, a push-in depth when a penetration crack is generated in the punch stretch forming test is determined so as to contribute to improvement of formability. The push-in depth varies depending on the work hardening exponent (n-value). To measure the push-in depth, a sample 8 disposed between a dice 4 and a blank holder 6 is subjected to the punch stretch forming test using a round-head punch 2 having a diameter of 50 mm, as illustrated specifically in FIG. 1. The brazing sheet is controlled such that the push-in depth of the brazing sheet when the penetration crack is generated with the round-head punch 2 penetrating the sample 8 is not less than 10 mm. In the case where the push-in depth is less than 10 mm, the lattice defects introduced by the plastic deformation are not distributed uniformly, so that the degree of flatness of the rolled sheet is low, and desired formability cannot be easily obtained. In the punch stretch forming test using the round-head punch 2, the push-in depth when the penetration crack is generated is preferably not less than 12 mm, and more preferably not less than 14 mm.