Fabrication method for compact tension specimen used for performance testing of material
A technology for compact tensile specimens and material properties, applied in the preparation of test samples, etc., to achieve the effect of ensuring accuracy
- Summary
- Abstract
- Description
- Claims
- Application Information
AI Technical Summary
Problems solved by technology
Method used
Image
Examples
Embodiment 1
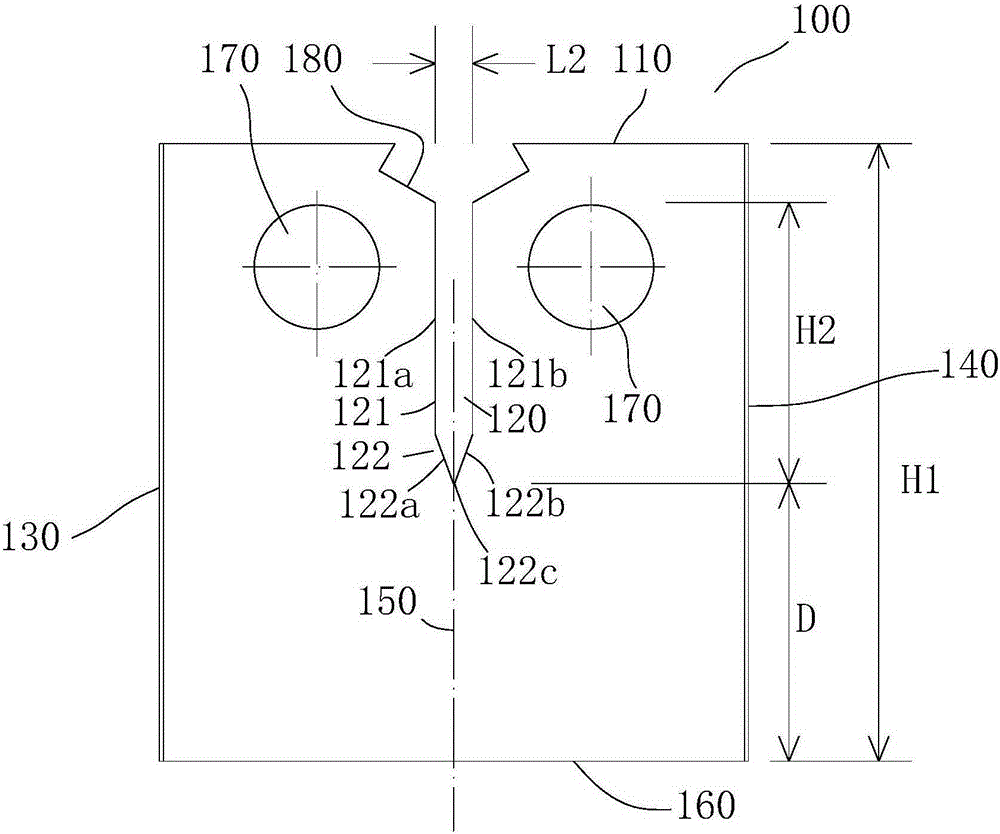
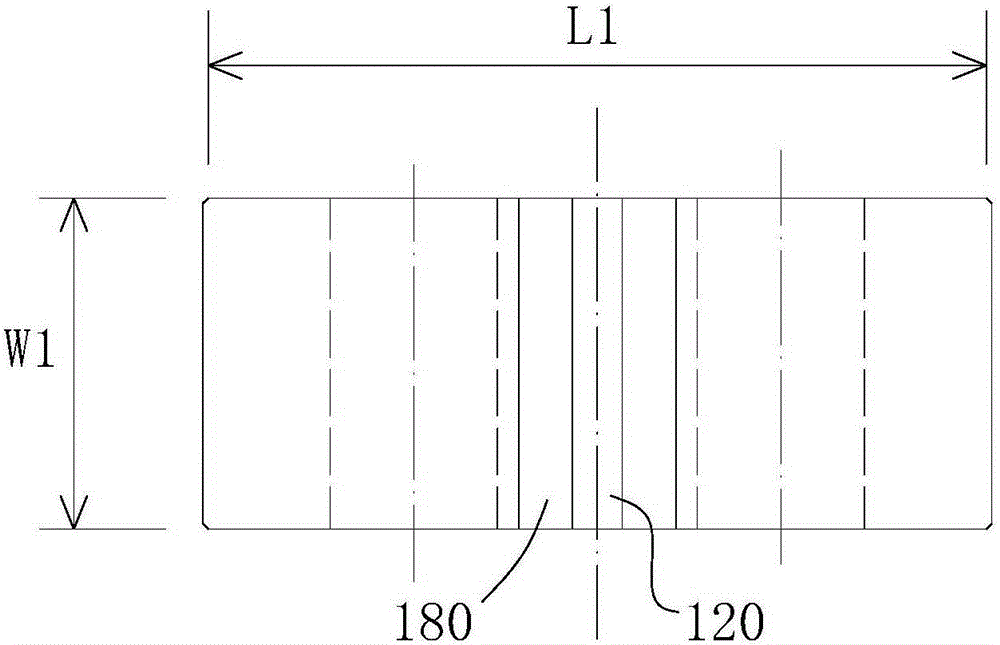
[0023] Such as figure 1 As shown, for a compact tensile sample used in a nuclear reactor pressure vessel, the shape of the sample body 100 is a cuboid, and the upper surface 110 of the sample body 100 is vertically opened with a narrow width that runs through the front and back of the sample body 100. The deep groove 120 on the surface, the deep groove 120 includes a straight groove part 121 and a sharp corner part 122 at the bottom of the straight groove part 121, the straight groove part 121 has a design between the left side 130 and the right side 140 of the sample body 100 The left straight wall 121a and the right straight wall 121b are left and right symmetrical with respect to the central line 150 between them. The upper end of the wall 122b is connected to the left straight wall 121a and the lower end of the right straight wall 121b respectively, and the lower end of the left inclined wall 122a is connected to the lower end of the right inclined wall 122b through a fill...
Embodiment 2
[0035] Example 2 On the basis of Example 1, the link of coarse grinding of deep grooves is simplified as follows: choose the NORTON grinding wheel (model WA80-LV-Φ200*6*Φ31.75) of the French Saint-Gobain Group and grind it , the left-right symmetrical grinding method is adopted, the actual thickness of the first grinding wheel after grinding is 0.03 to 0.07mm narrower than the designed groove width, and the actual angle at the sharp corner of the first grinding wheel is the design included angle between the left inclined wall and the right inclined wall Within the range of ±2°, the actual radius of the outer fillet at the tip of the sharp corner of the first grinding wheel is within the range of ±0.05mm from the design radius of the inner fillet; then use the first grinding wheel to roughly grind the straight groove portion 121 and the sharp corner part 122, during rough grinding, the left-right symmetrical centerline of the first grinding wheel is kept coincident with the cent...
Embodiment 3
[0037]Example 3 On the basis of Example 2, step d of the fine grinding deep groove link was repeated three times. The second grinding wheel model used for the first time was WA120-LV-Φ200*6*Φ31.75. The model of the second grinding wheel used is WA180-LV-Φ200*6*Φ31.75, the model of the second grinding wheel used for the third time is WA240LV-Φ200*6*Φ31.75, that is, the particle size of the second grinding wheel used for the above three times is from 120#-180#-240# decrease in turn. Adopt the method of embodiment 2 to trial-manufacture 120 compact tensile samples, the qualified rate of the product reaches 100%, and the actual radius of fillet 122c of more than 90% of the samples reaches R0.05±0.015mm, and the groove depth D reaches 14.275± 0.015mm, which better guarantees the dimensional accuracy at the fillet 122c.
PUM
 Abstract
Description
Claims
Application Information
 - R&D Engineer
- R&D Manager
- IP Professional
- Industry Leading Data Capabilities
- Powerful AI technology
- Patent DNA Extraction
Browse by: Latest US Patents, China's latest patents, Technical Efficacy Thesaurus, Application Domain, Technology Topic, Popular Technical Reports.
© 2024 PatSnap. All rights reserved.Legal|Privacy policy|Modern Slavery Act Transparency Statement|Sitemap|About US| Contact US: help@patsnap.com


