Method for controlling accuracy of shape of ultrahigh-strength steel thin-wall cylinder
An ultra-high-strength steel, thin-walled cylinder technology, applied in the direction of manufacturing tools, furnace types, furnaces, etc., can solve the problems of high shell strength, products can only be used for ground tests, and difficult to process thin-walled parts, and achieve shape accuracy. high effect
- Summary
- Abstract
- Description
- Claims
- Application Information
AI Technical Summary
Problems solved by technology
Method used
Image
Examples
Embodiment 1
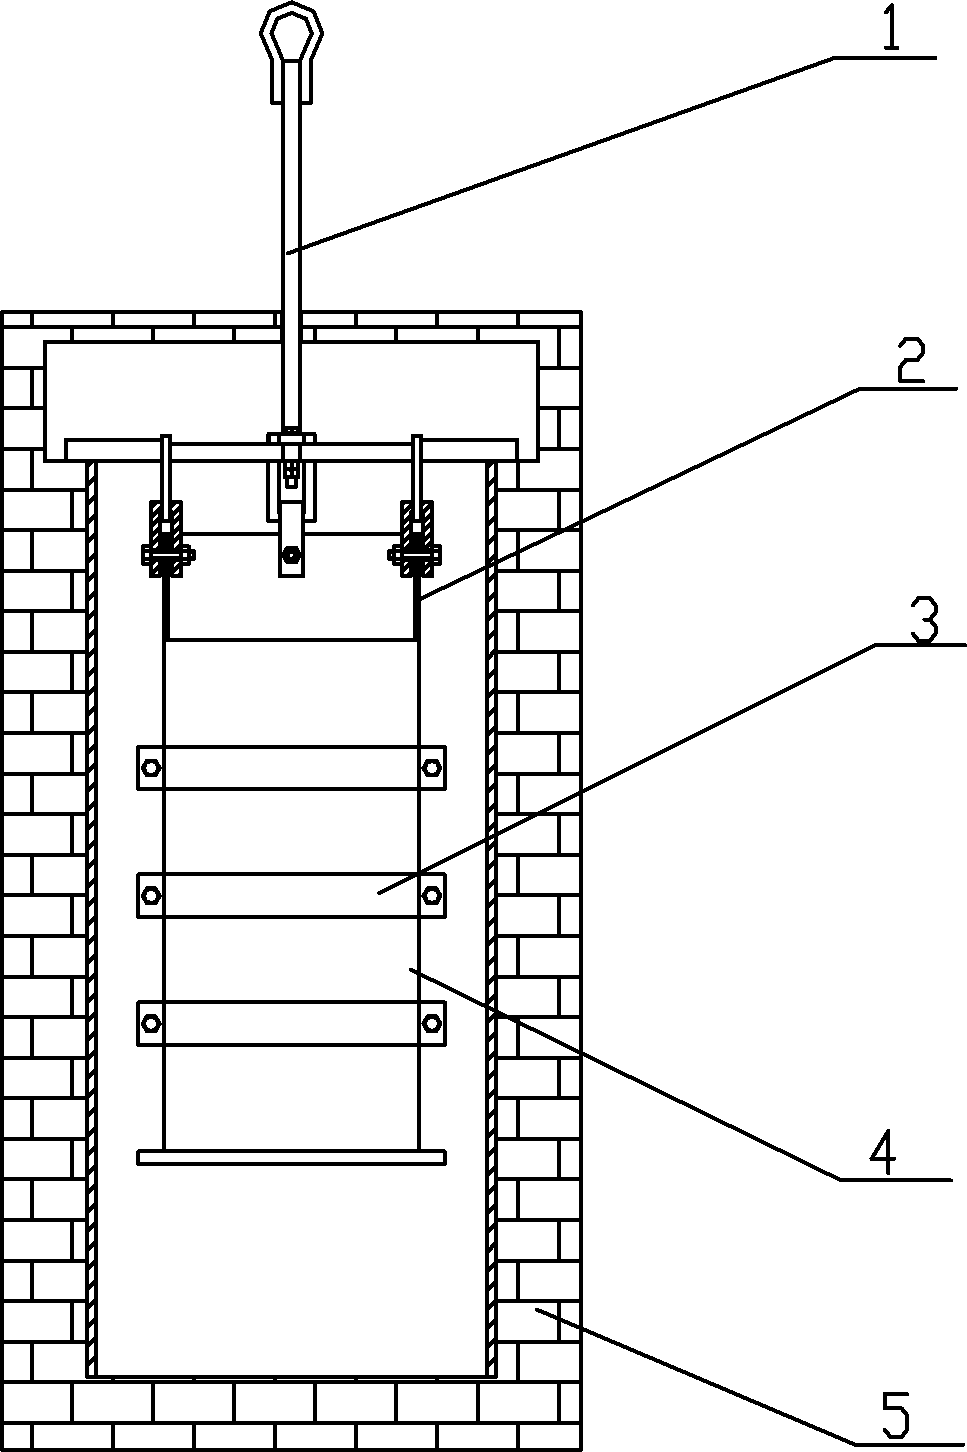
[0026] For an ultra-high-strength steel supplementary combustion chamber cylindrical shell with a size parameter of Φ260mm×2000mm and a wall thickness of 2mm on an aircraft, the shape accuracy control process is as follows:
[0027] 1) Cylindrical shape inspection: After the cylindrical shell 4 of the supplementary combustion chamber is quenched, a cross-section is detected at intervals of 300 mm along the axial direction of the cylindrical shell 4, a total of 7 cross-sections, and each section is equally divided along the circumferential direction to detect 6 The size and diameter difference of the bar diameters, and the straightness of the 12 busbars corresponding to the two ends of the 6 diameters are detected at the same time, and marked and recorded.
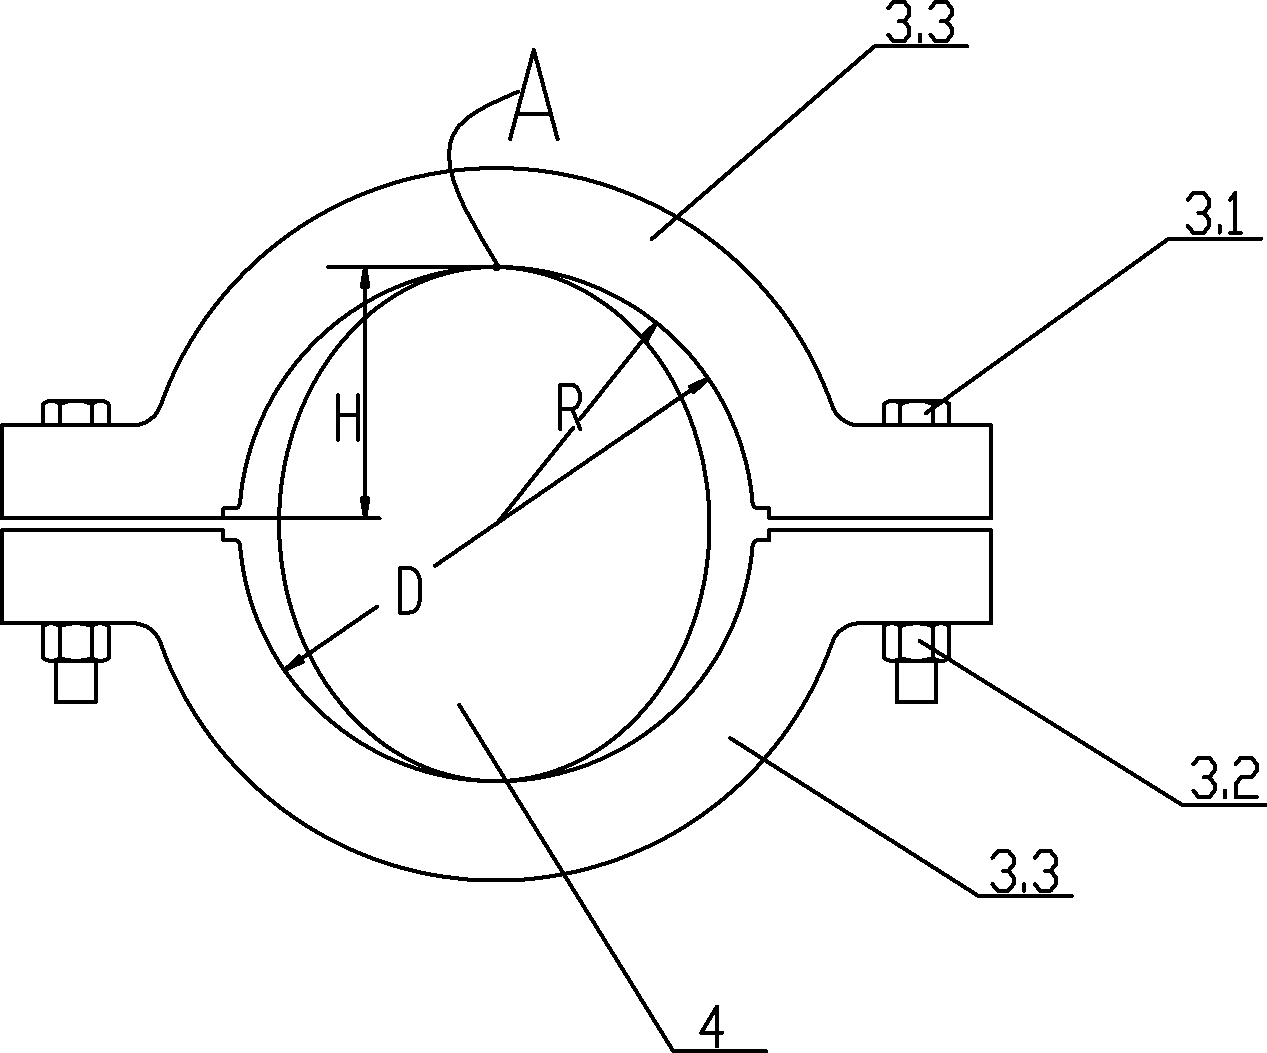
[0028] 2) Installation of the special correction fixture: the special correction fixture 3 is installed on the outer cylindrical surface of the cylinder shell 4, the special correction fixture 3 includes a pair of heat-resis...
Embodiment 2
[0034] For an ultra-high-strength steel supplementary combustion chamber cylindrical shell with a size parameter of Φ600mm×3500mm and a wall thickness of 3mm on an aircraft, the shape accuracy control process is as follows:
[0035] 1) Cylindrical body shape inspection: After the cylindrical shell 4 of the supplementary combustion chamber is quenched, a cross-section is detected at intervals of 300mm along the axial direction of the cylindrical shell 4, a total of 12 cross-sections, and each section is equally divided along the circumferential direction to detect 6 The size and diameter difference of the bar diameters, and the straightness of the 12 busbars corresponding to the two ends of the 6 diameters are detected at the same time, and marked and recorded.
[0036] 2) Installation of the special correction fixture: the special correction fixture 3 is installed on the outer cylindrical surface of the cylinder shell 4, the special correction fixture 3 includes a pair of heat-...
PUM
| Property | Measurement | Unit |
|---|---|---|
| diameter | aaaaa | aaaaa |
Abstract
Description
Claims
Application Information
 - R&D Engineer
- R&D Manager
- IP Professional
- Industry Leading Data Capabilities
- Powerful AI technology
- Patent DNA Extraction
Browse by: Latest US Patents, China's latest patents, Technical Efficacy Thesaurus, Application Domain, Technology Topic, Popular Technical Reports.
© 2024 PatSnap. All rights reserved.Legal|Privacy policy|Modern Slavery Act Transparency Statement|Sitemap|About US| Contact US: help@patsnap.com


