
Method and apparatus for measuring the straightness error of slender bodies, with compensation of gravity deformation

a technology of slender bodies and straightness errors, applied in the field of measuring apparatuses, can solve the problems of long measurement time, unsuitable for production line implementation, and ineffective system for carrying out dimensional checks on production lines, and achieve the effect of reducing measurement tim

Active Publication Date: 2020-10-29
Q TECH CO LTD
View PDF0 Cites 5 Cited by
  • Summary
  • Abstract
  • Description
  • Claims
  • Application Information

AI Technical Summary

Benefits of technology

The patent proposes an apparatus and method for measuring the deformation of a bar without using any mobile or tilting mechanical elements. The method measures the forces applied by the bar to the supporting system, which causes temporary deformation of the bar. This deformation is then subtracted from the overall deformation detected by the first detecting system to obtain the effective measure of the deformation of the bar itself. This allows for the compensation of straightness errors induced on the bar by the supporting system. The straightness error can be measured on the entire length of the bar or on specific portions of interest. The analysis can be repeated several times on adjacent portions of the bar to determine local non-straightness.

Problems solved by technology

Although very accurate and not intrinsically affected by the measurement errors caused by deformation due to the force of gravity acting on the bar, it is very slow and therefore unsuitable for being implemented on the production line, where the cycle times are too short; in particular, the current processing plants, for example in the brass sector, process bundles at a speed of about 60-120 m / min, therefore producing finished bars of a length of 3 to 5 m at a frequency of one bar every 1-3 seconds.
However, the aforesaid technique requires much longer measurement times and is therefore only traditionally used to check samples next to the line.
However, these systems are designed to detect the waviness of the material before it is cut into bars and are, therefore, not often used, or even unused, once the production speed is increased, due to material deformations and oscillations caused by the speed and drive system; moreover, these systems measure the material before it is cut into bars and subjected to a longitudinal traction force, therefore neither considering the effect of the cutting process on the finished product nor providing indications with regard to the effect of the residual stress in the material, which can deform the bar following the cutting process.
Other measurement systems, used to estimate the curvature of the material, use multiple contact sensors coupled to an apposite rolling surface, but are disadvantageously only usable under well-controlled measuring conditions and difficult to adapt to the measurement of bars with sections that are not round; moreover, these systems often involve measurement errors caused by, for example, friction and unpredictable rolling of the material, mechanical adjustments or wearing of the components; therefore, also these systems are not very effective in carrying out dimensional checks on the production line.
Moreover, these systems measure the magnitude of the straightness error of the material, but these measures are always indirect and unable to accurately provide the effective measure of the straightness error of the material.
Devices using optical sensors were also proposed, but these do not, however, provide satisfactory results in terms of the precision and accuracy of the measurement carried out; in particular, all of the currently known solutions proposed do not provide a compensation of the measurement errors intrinsically caused by the deformation of the bar generated by the force of gravity acting on the bar itself, errors which can progressively become very significant for materials that gradually become thinner and more flexible.
In any case, it is necessary to have a couple of sensors at each section of the bar to be measured, which requires the presence of a high number of measuring sensors, at least six sensors in a minimum configuration and without achieving a particularly accurate measurement.
Moreover, the presence of only two measures for each section does not allow to obtain a particularly accurate estimate of the real center position of the bar section analyzed; moreover, the determination of this center is only accurate in case of circular bodies, the measurement being essentially based on a shadow projection and not on the effective survey of the geometry of the section of the material.
Moreover, the system does not provide any compensation of the effects of gravity on the bar, and is therefore extremely inaccurate in case of slender bodies with geometries that can be easily deformed only by the force of their own weight.
In addition to presenting the same problems of the apparatus according to the document W02006138228 Al, the fact that the tube is cantileverly restrained can cause further bending of the tube due to its weight.
Moreover, this system can measure straightness defects in only one direction and is completely unsuitable for being used on the production line.
The system cannot therefore detect if the bar of reference is effectively devoid of straightness errors; moreover, such a system is not very flexible given the necessity to have the image of a corresponding bar of reference in order to be able to evaluate a bar.
However, these solutions still have practical use limitations and, more specifically, require an often not so easy configuration of the bar supporting system on the basis of the length of the body to be measured; moreover being based on a thrust and counterthrust equilibrium system on the bar, therefore requiring rather long adjustment times before reaching the equilibrium required to carry out the measurement.
Therefore, these may not always be compatible with the cycle times available in the continuous cycle production plants.

Method used


Image

  • Method and apparatus for measuring the straightness error of slender bodies, with compensation of gravity deformation
  • Method and apparatus for measuring the straightness error of slender bodies, with compensation of gravity deformation
  • Method and apparatus for measuring the straightness error of slender bodies, with compensation of gravity deformation

Examples


Embodiment Construction

[0043]In said drawings, 1 globally denotes a device for measuring the straightness errors of an elongated-shape element, such as a bar, shaft, tube and the like, hereinafter simply named bar 2. The bar can have a section of any geometry, for example circular, hexagonal, squared, etc., of any size and any material, preferably metal.

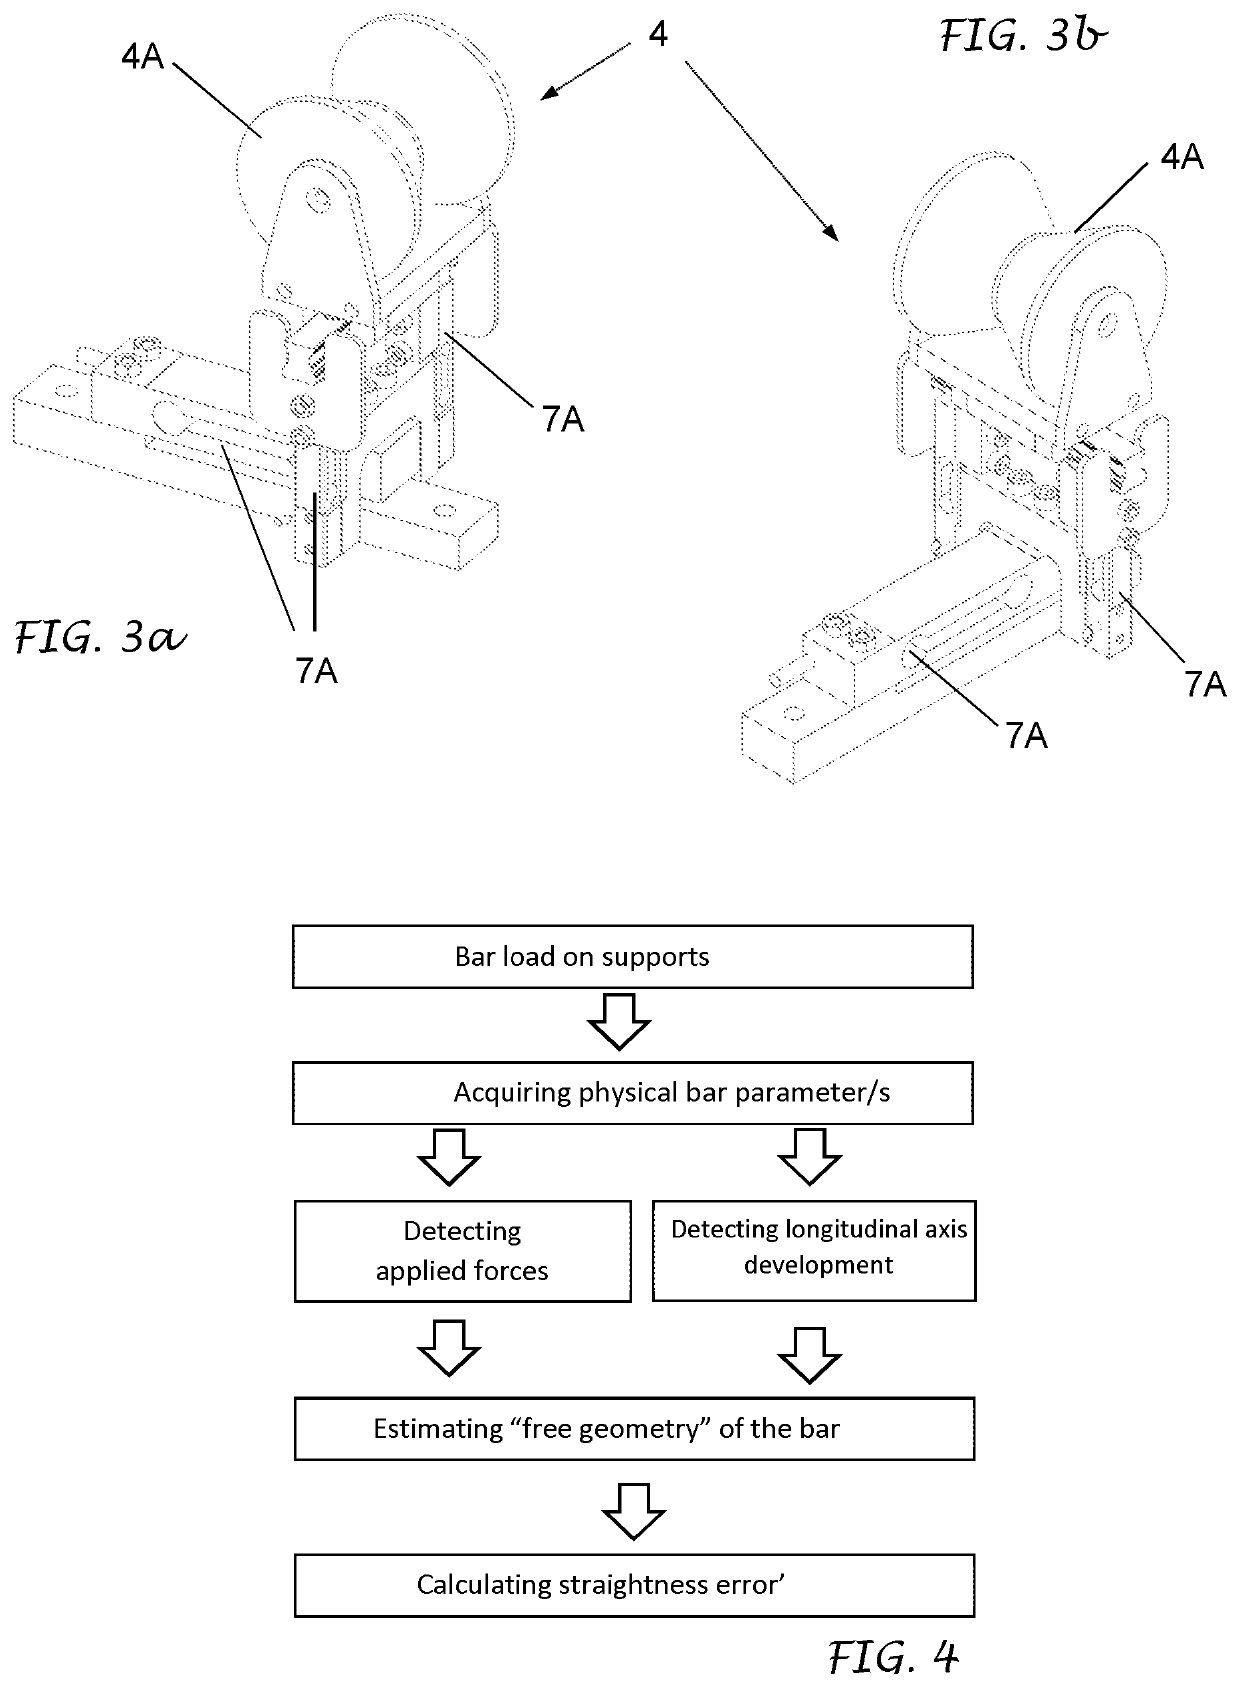
[0044]As schematically shown in FIG. 1, the measuring device 1 comprises:[0045]a supporting system 3, which remains static during the measurement cycle of each bar, for supporting the bar and composed of a plurality of fixed bearing elements 4 on which the bar under measuring is arranged. The bearing elements can be moved between one measurement and another whenever necessary;[0046]a first detecting element 5 to detect the development of the longitudinal axis of the bar 2 and comprising one or more first sensors 6, preferably optical sensors, for detecting the tridimensional geometry of the bar under measuring.[0047]a second detecting system 7 to detect th...


PUM


Abstract

An apparatus and a relative method for measuring straightness errors of elongated-shape elements, such as bars, tubes and the like is presented. The measuring apparatus includes a supporting system for a bar, a first detecting system having one or more first sensors to detect the development of the longitudinal axis of the bar, and a central control unit. The measuring apparatus further includes a second detecting system provided with a plurality of second sensors to detect the forces the bar applies to the supporting system and acquiring means to acquire at least one physical parameter of the bar under measuring. The central control unit includes at least one data acquiring and processing module to acquire and process the data detected by said first and second detecting systems and acquired by said acquiring means, in order to determine the possible straightness error of the bar.

Description

FIELD OF THE INVENTION[0001]The present invention generally concerns the measurement apparatus sector and, in particular, a method and apparatus for measuring straightness errors of elongated-shape elements, typically shafts, bars or tubes. Preferably, it concerns elements made of metal materials and the measurement occurs during their production cycle.STATE OF THE ART[0002]In the bar production sector, in particular of metal material, and more specifically in the drawing of brass, aluminum and steel, there are known methods for measuring the straightness of finished product and to determine the presence of possible straightness errors of bar-shaped products and the like, also named deflection. In other words, it is necessary to detect if the bar under examination has any straightness errors, i.e. is not straight but has one or more curvatures along its longitudinal axis, and to measure these errors in order to determine whether or not the bar complies with the predefined qualitativ...

Claims


Application Information

Patent Timeline
Patent Type & Authority Applications(United States)
IPC IPC(8): G01B11/27G01B5/00G01B21/04
CPCG01B5/0016G01B21/045G01B11/272G01B11/245G01B11/306
Inventor FUMAGALLI, LUCATOMASSINI, PAOLOTOSI, DIEGOGREGORELLI, ERIKA
Owner Q TECH CO LTD
Learn More