A method and device for improving the accuracy of ndt test results
A technology with test results and accuracy, applied in the direction of using a single impact force to test material strength, investigation stage/state change, etc. The effect of reducing test data errors and improving accuracy
- Summary
- Abstract
- Description
- Claims
- Application Information
AI Technical Summary
Problems solved by technology
Method used
Image
Examples
Embodiment 1
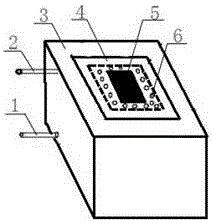
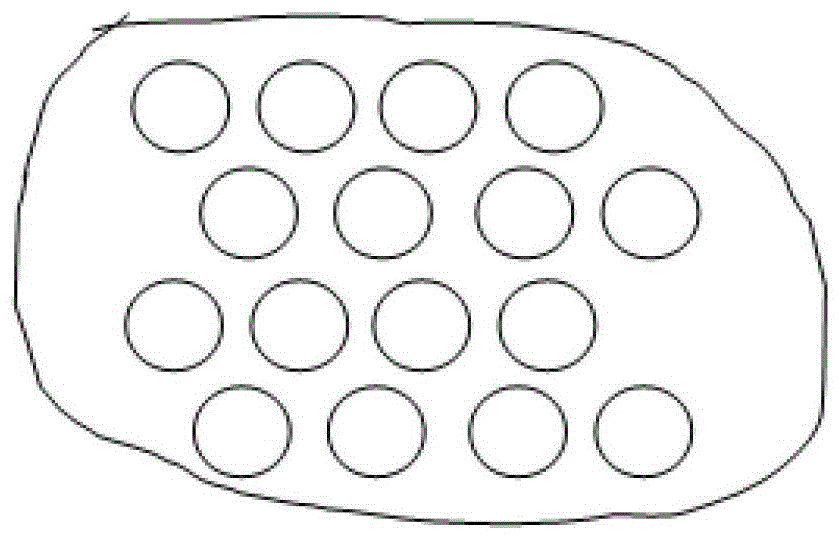
[0027] A device to improve the accuracy of NDT test results, such as figure 1 and figure 2 As shown, it includes a cooling box 3 that can pass into the circulating cooling liquid and a specimen tank 4 placed inside the cooling box 3. On the surface of the same side of the cooling box 3, a cooling liquid outlet 2 and a cooling liquid outlet 2 for the cooling liquid to enter and exit are respectively provided. The height of the liquid inlet 1 and the cooling liquid outlet 2 is higher than that of the cooling liquid inlet 1, and the height of the cooling liquid outlet 2 is flush with the upper surface of the cooling box 3. The side wall and the bottom surface of the test piece groove 4 are provided with several A circular through-hole 6 that is evenly distributed to allow cooling liquid to flow through is provided with several (two in this embodiment) ribs 7 that protrude toward the inside of the tank body on the bottom surface of the test piece tank 4 .
[0028] In this embod...
Embodiment 2
[0035] The methods and devices used to improve the accuracy of NDT test results are as follows:
[0036] 1. Make the E690 marine engineering steel that needs to be measured into a test specimen 5.
[0037] 2. Connect the coolant inlet 1 and coolant outlet 2 of the cooling box 3 to circulating liquid nitrogen. After the liquid nitrogen can circulate and pass through the cooling box 3 stably, the test piece 5 is placed in the test piece groove 4, so that the test piece 5 Fully contact with liquid nitrogen, and weld the crack source weld bead required for the test on the test piece 3, and reduce the temperature of the test piece 5 during surfacing welding by liquid nitrogen.
[0038] 4. The crack source is processed on the weld bead of specimen 5, the cooling rate of the heat affected zone is 50~100°C / s, the structure of the heat affected zone is martensite + lath bainite, and the width of the heat affected zone is 0.5mm (Without using the cooling equipment, the cooling rate of ...
Embodiment 3
[0041] The methods and devices used to improve the accuracy of NDT test results are as follows:
[0042] 1. The 9% Ni low temperature steel to be measured is made into test specimen 5.
[0043]2. Connect the cooling liquid inlet 1 and the cooling liquid outlet 2 of the cooling box 3 to the circulating cooling water. After the cooling water can circulate and pass through the cooling box 3 stably, the test piece 5 is placed in the test piece groove 4, so that the test piece 5 Fully contact with the cooling water, and weld the crack source weld bead required for the test on the test piece 3, reduce the temperature of the test piece 5 during surfacing welding through the cooling water, and the cooling rate of the heat-affected zone is 30~60℃ / s, The structure of the heat-affected zone is martensite + bainite, and the width of the heat-affected zone is 0.6mm (without using the cooling equipment, the cooling rate of the heat-affected zone is 0~45°C / s, and the structure of the heat-af...
PUM
| Property | Measurement | Unit |
|---|---|---|
| diameter | aaaaa | aaaaa |
Abstract
Description
Claims
Application Information
 - R&D
- Intellectual Property
- Life Sciences
- Materials
- Tech Scout
- Unparalleled Data Quality
- Higher Quality Content
- 60% Fewer Hallucinations
Browse by: Latest US Patents, China's latest patents, Technical Efficacy Thesaurus, Application Domain, Technology Topic, Popular Technical Reports.
© 2025 PatSnap. All rights reserved.Legal|Privacy policy|Modern Slavery Act Transparency Statement|Sitemap|About US| Contact US: help@patsnap.com


