Polycrystalline material plate frame finish machining method based on internal residual stress nondestructive measurement
A technology of internal residual stress and polycrystalline materials, which is applied in the field of precision workpiece processing, can solve problems such as out-of-tolerance deformation, and achieve the effects of reducing processing deformation, reducing trial and error costs, and reducing scrap rate
- Summary
- Abstract
- Description
- Claims
- Application Information
AI Technical Summary
Problems solved by technology
Method used
Image
Examples
Embodiment 1
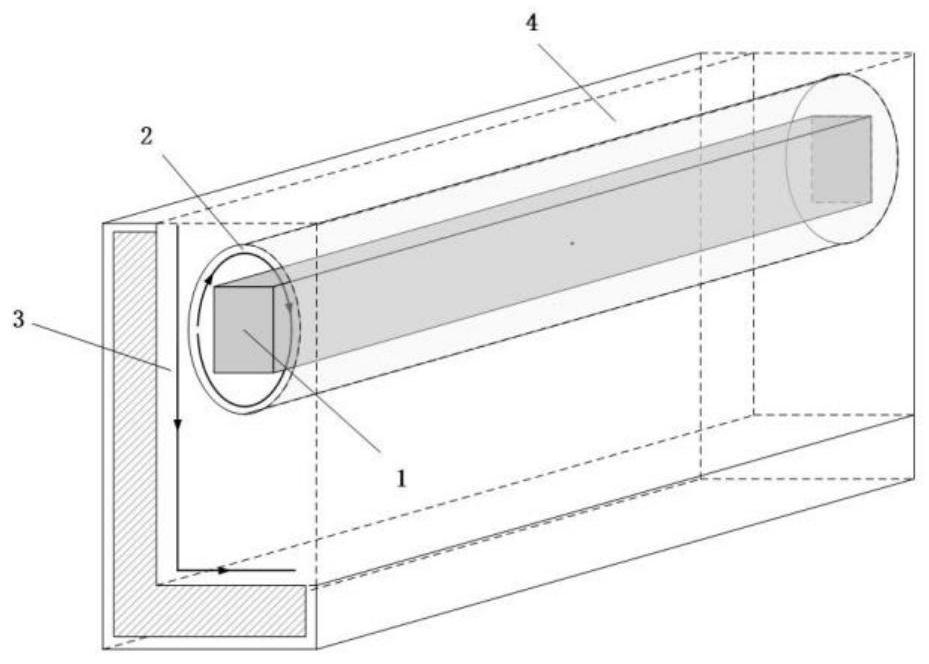
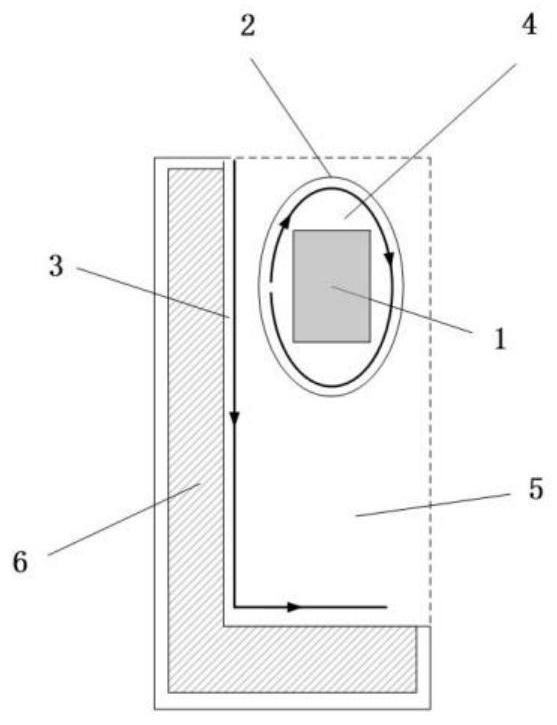
[0045] like figure 2 , image 3 As shown, the metal plate to be processed used in this embodiment is a 2024-T351 pre-stretched aluminum plate, and the dimensional tolerance required by the L-shaped plate frame is ±0.20mm. The finishing method according to the present invention is carried out as follows:
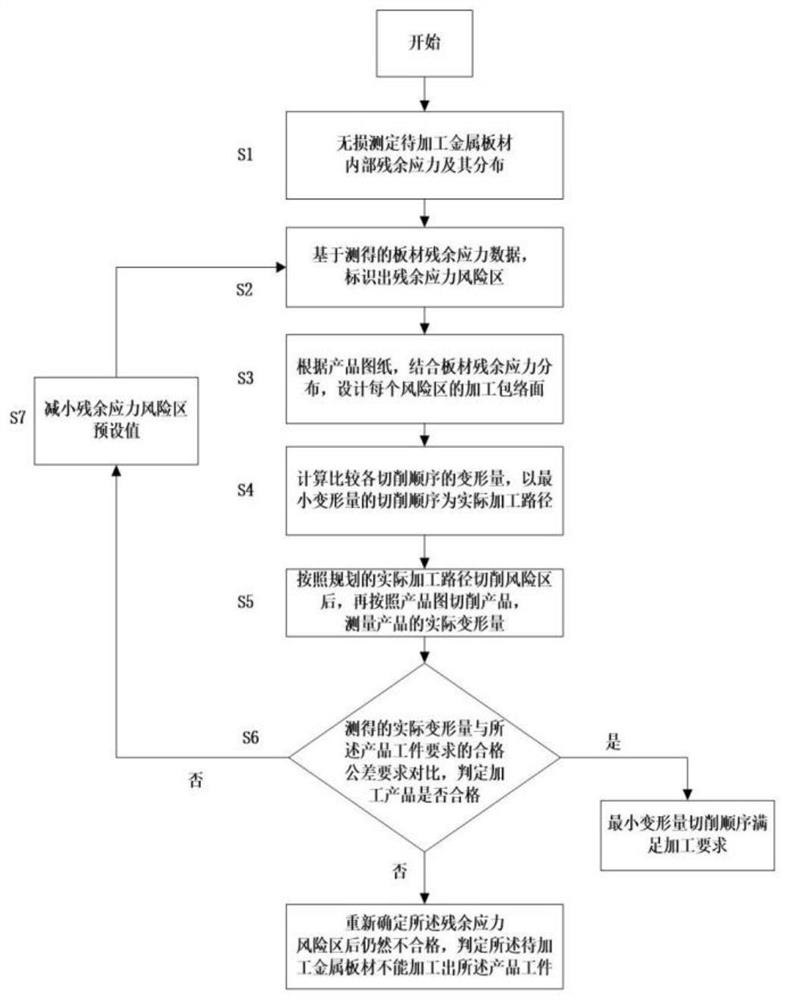
[0046] S1, data collection: The residual stress and its distribution in different parts of the pre-stretched aluminum sheet to be processed are non-destructively measured by the short-wavelength characteristic X-ray diffraction method (for the specific detection method, please refer to the reference "Short-wavelength X-ray diffraction non-destructive measurement of the internal residual stress of the aluminum sheet "Wait);
[0047] S2, identify the risk area: Based on the stress data collected in step S1, analyze the distribution characteristics of the residual stress inside the plate, and identify the high tensile stress area, the high pressure stress area and the area wit...
Embodiment 2
[0054] like Figure 4 , Figure 5 As shown, the metal plate to be processed used in this embodiment is a 7050-T7451 pre-stretched aluminum plate, and the qualified tolerance of the size required by the cylindrical plate and frame is ±0.10mm. The finishing method according to the present invention is carried out as follows:
[0055] S1, data collection: non-destructive detection of internal residual stress and its distribution in different parts of the metal sheet to be processed by ultrasonic method;
[0056] S2, identify the risk area: based on the stress data collected in step S1, analyze the distribution characteristics of the residual stress inside the plate, set and identify the high tensile stress area, high pressure stress area and stress gradient preset value where the residual stress is higher than the preset value of 70MPa The area higher than 35 MPa / mm is a risk area, and there are three risk areas in this embodiment, which are risk area A6, risk area B7 and risk a...
Embodiment 3
[0064] The metal plate to be processed used in this embodiment is the same as that in Embodiment 2, and it is also a 7050-T7451 pre-stretched aluminum plate. The product workpiece to be processed is also the same as that in Embodiment 2, and it is also a cylindrical plate and frame, but the required size tolerance is acceptable. Be ± 0.01mm, according to finishing method of the present invention also with embodiment 2, difference is:
[0065] (1) S1, data collection: non-destructive detection of internal residual stress and its distribution in different parts of the metal sheet to be processed by neutron diffraction method;
[0066](2) S7, re-determining the risk area: after reducing the preset value of the high tensile stress area and high pressure stress area to 25MPa, and the preset value of the high stress gradient area to 15MPa / mm, the re-determined risk area The processing envelope of each risk zone in its redesign covers an area that is too large, and the metal sheet to...
PUM
 Abstract
Description
Claims
Application Information
 - Generate Ideas
- Intellectual Property
- Life Sciences
- Materials
- Tech Scout
- Unparalleled Data Quality
- Higher Quality Content
- 60% Fewer Hallucinations
Browse by: Latest US Patents, China's latest patents, Technical Efficacy Thesaurus, Application Domain, Technology Topic, Popular Technical Reports.
© 2025 PatSnap. All rights reserved.Legal|Privacy policy|Modern Slavery Act Transparency Statement|Sitemap|About US| Contact US: help@patsnap.com


