Ultraprecise grinder with two stages of feeding mechanism and its control method
An ultra-precise, progressive technology, applied in the control of workpiece feed motion, ultra-finishing machines, grinding machine parts, etc., can solve the problems of low response frequency, high cost, and impossibility of dynamic compensation, and achieve research and development The effect of improving the success rate, shortening the cycle, and reducing the cost
- Summary
- Abstract
- Description
- Claims
- Application Information
AI Technical Summary
Problems solved by technology
Method used
Image
Examples
Embodiment 1
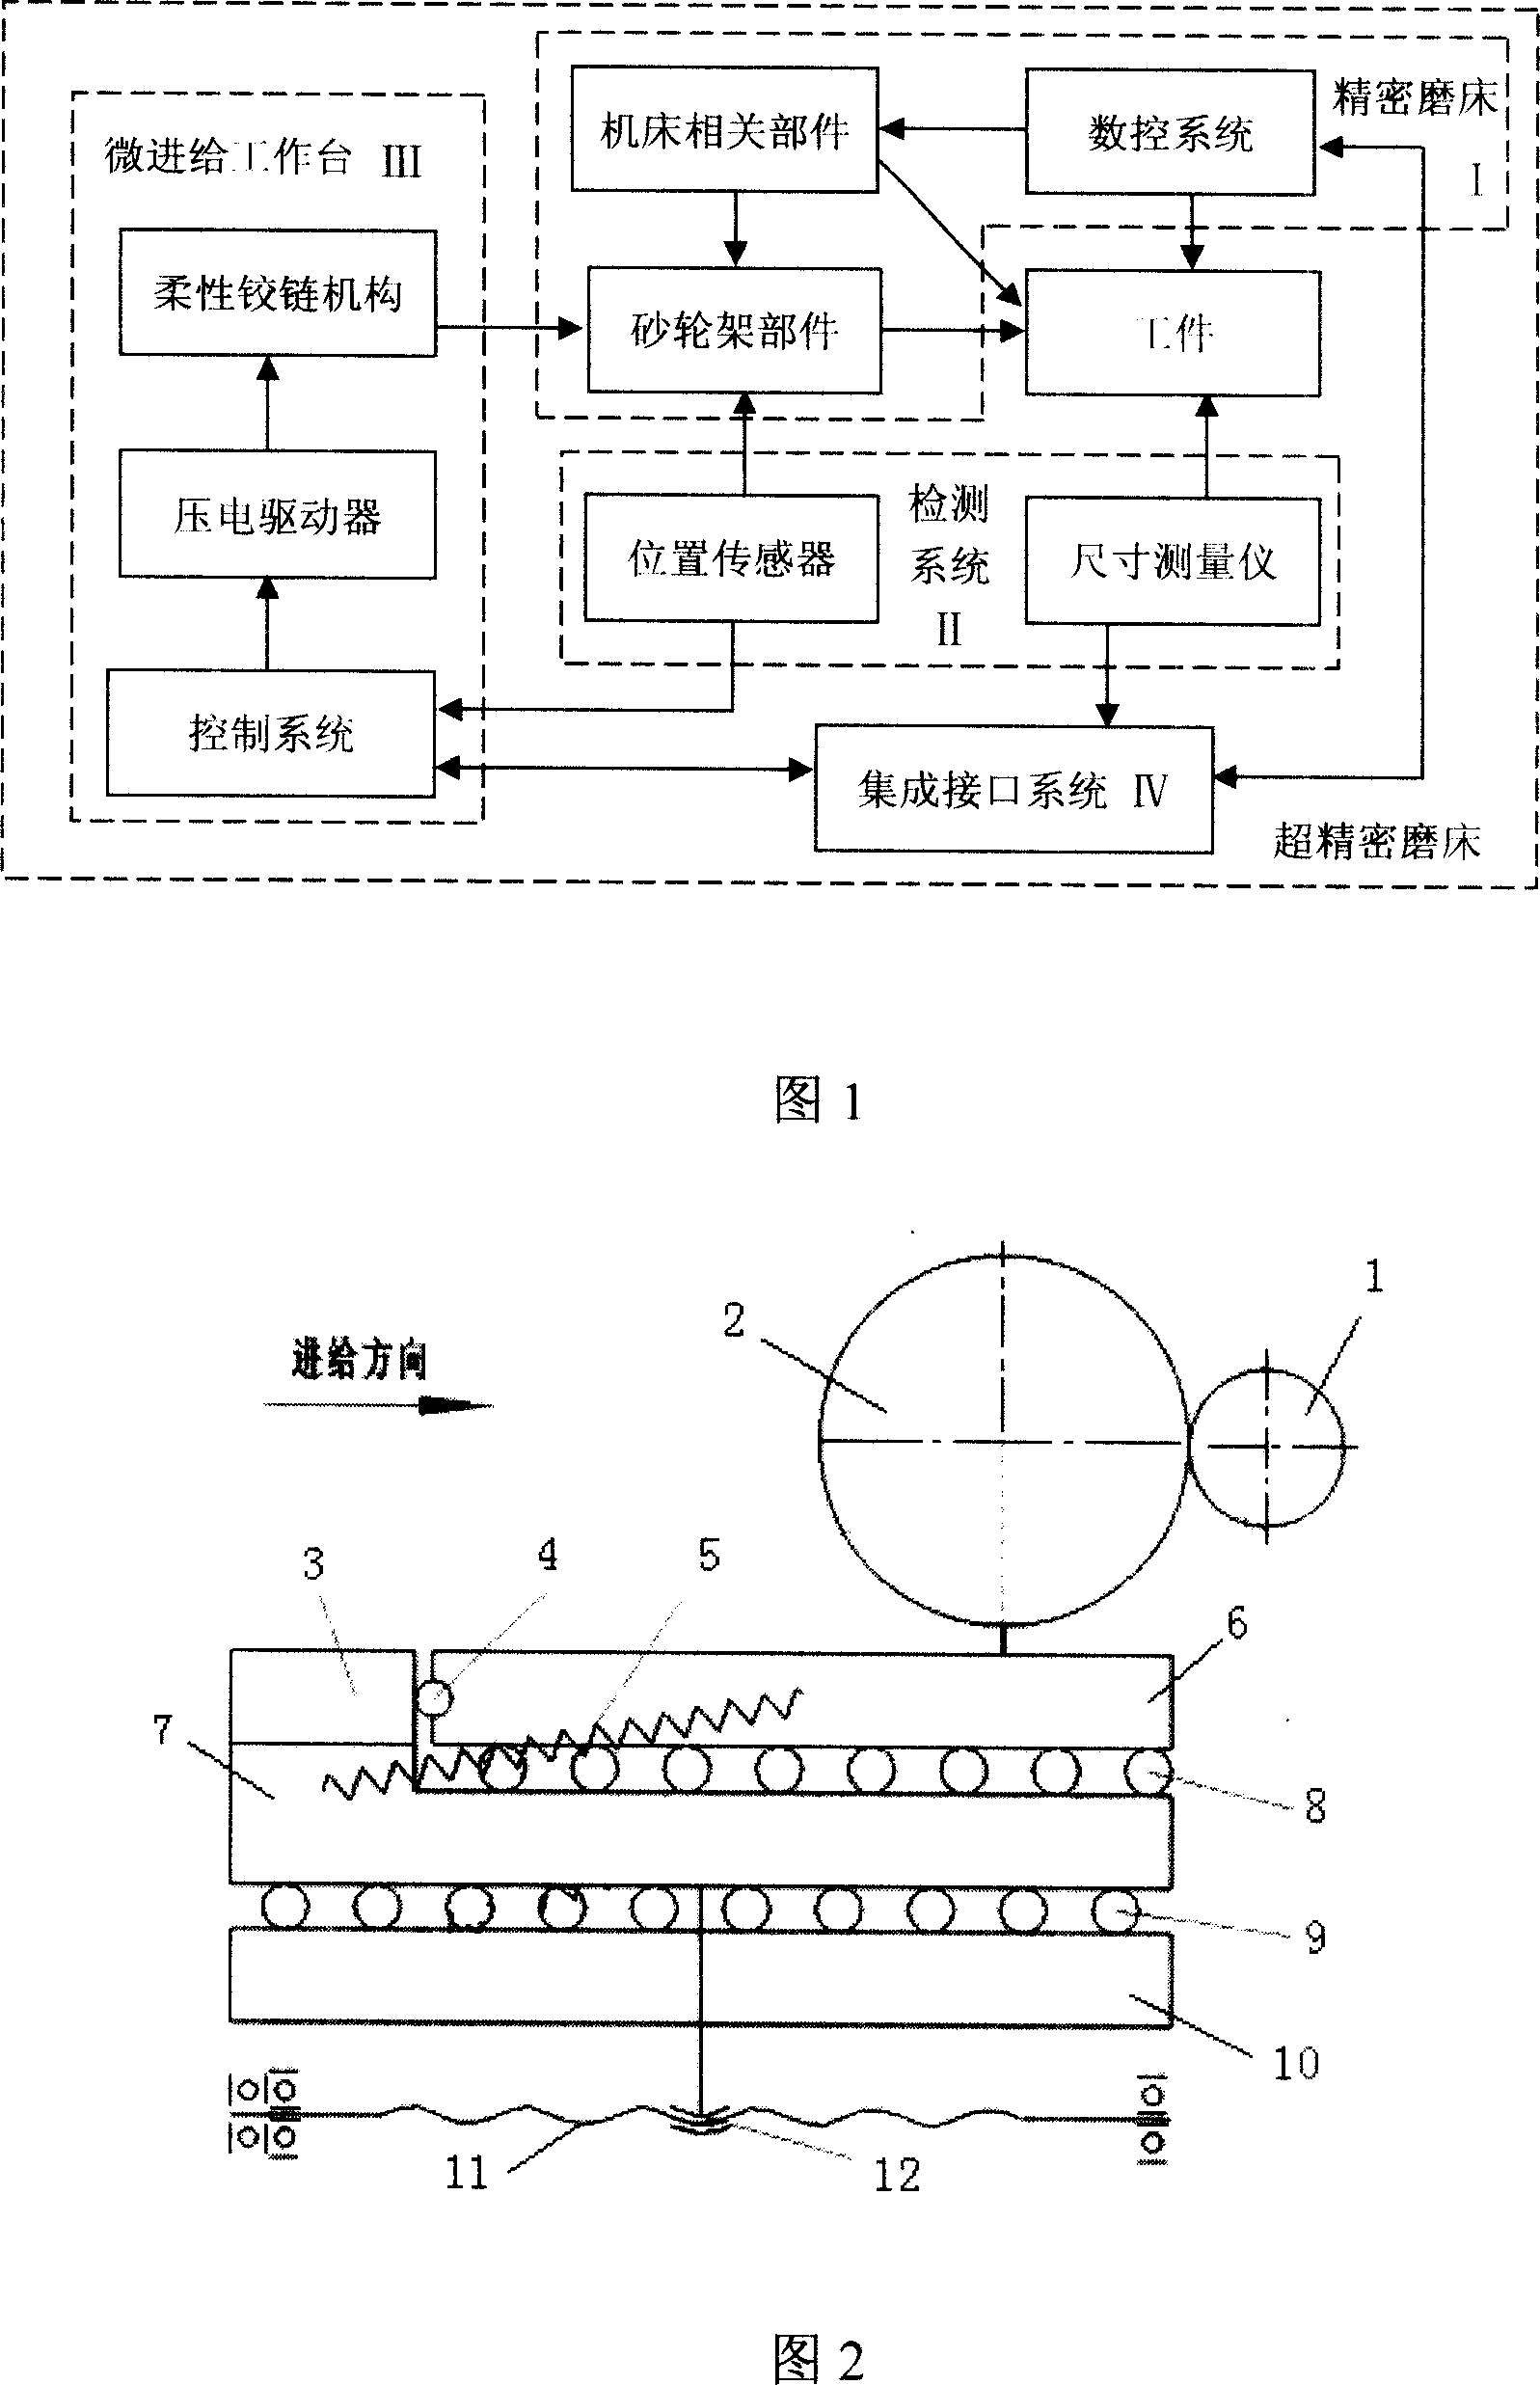
[0042] See Figure 1, the minimum setting unit of the workbench and grinding wheel frame of the high-precision CNC grinding machine MGK1320 is 0.5 μm, plus the size measuring instrument in the detection system II shown in Figure 1, the main processing accuracy that can be obtained, such as roundness 1 μm , cylindricity 3μm. On the basis of the configuration of the above-mentioned high-precision CNC grinding machine, adding the position sensor in the micro-feed workbench III and the detection system II in Fig. , Coordinating and driving the rough and fine feeding of the two-stage feeding mechanism successively to complete the precision grinding and fine grinding of the workpiece. With the cooperation of the size measuring instrument, the machining accuracy of the workpiece and the dimensional consistency of a batch of workpieces can be improved by one or more times.
Embodiment 2
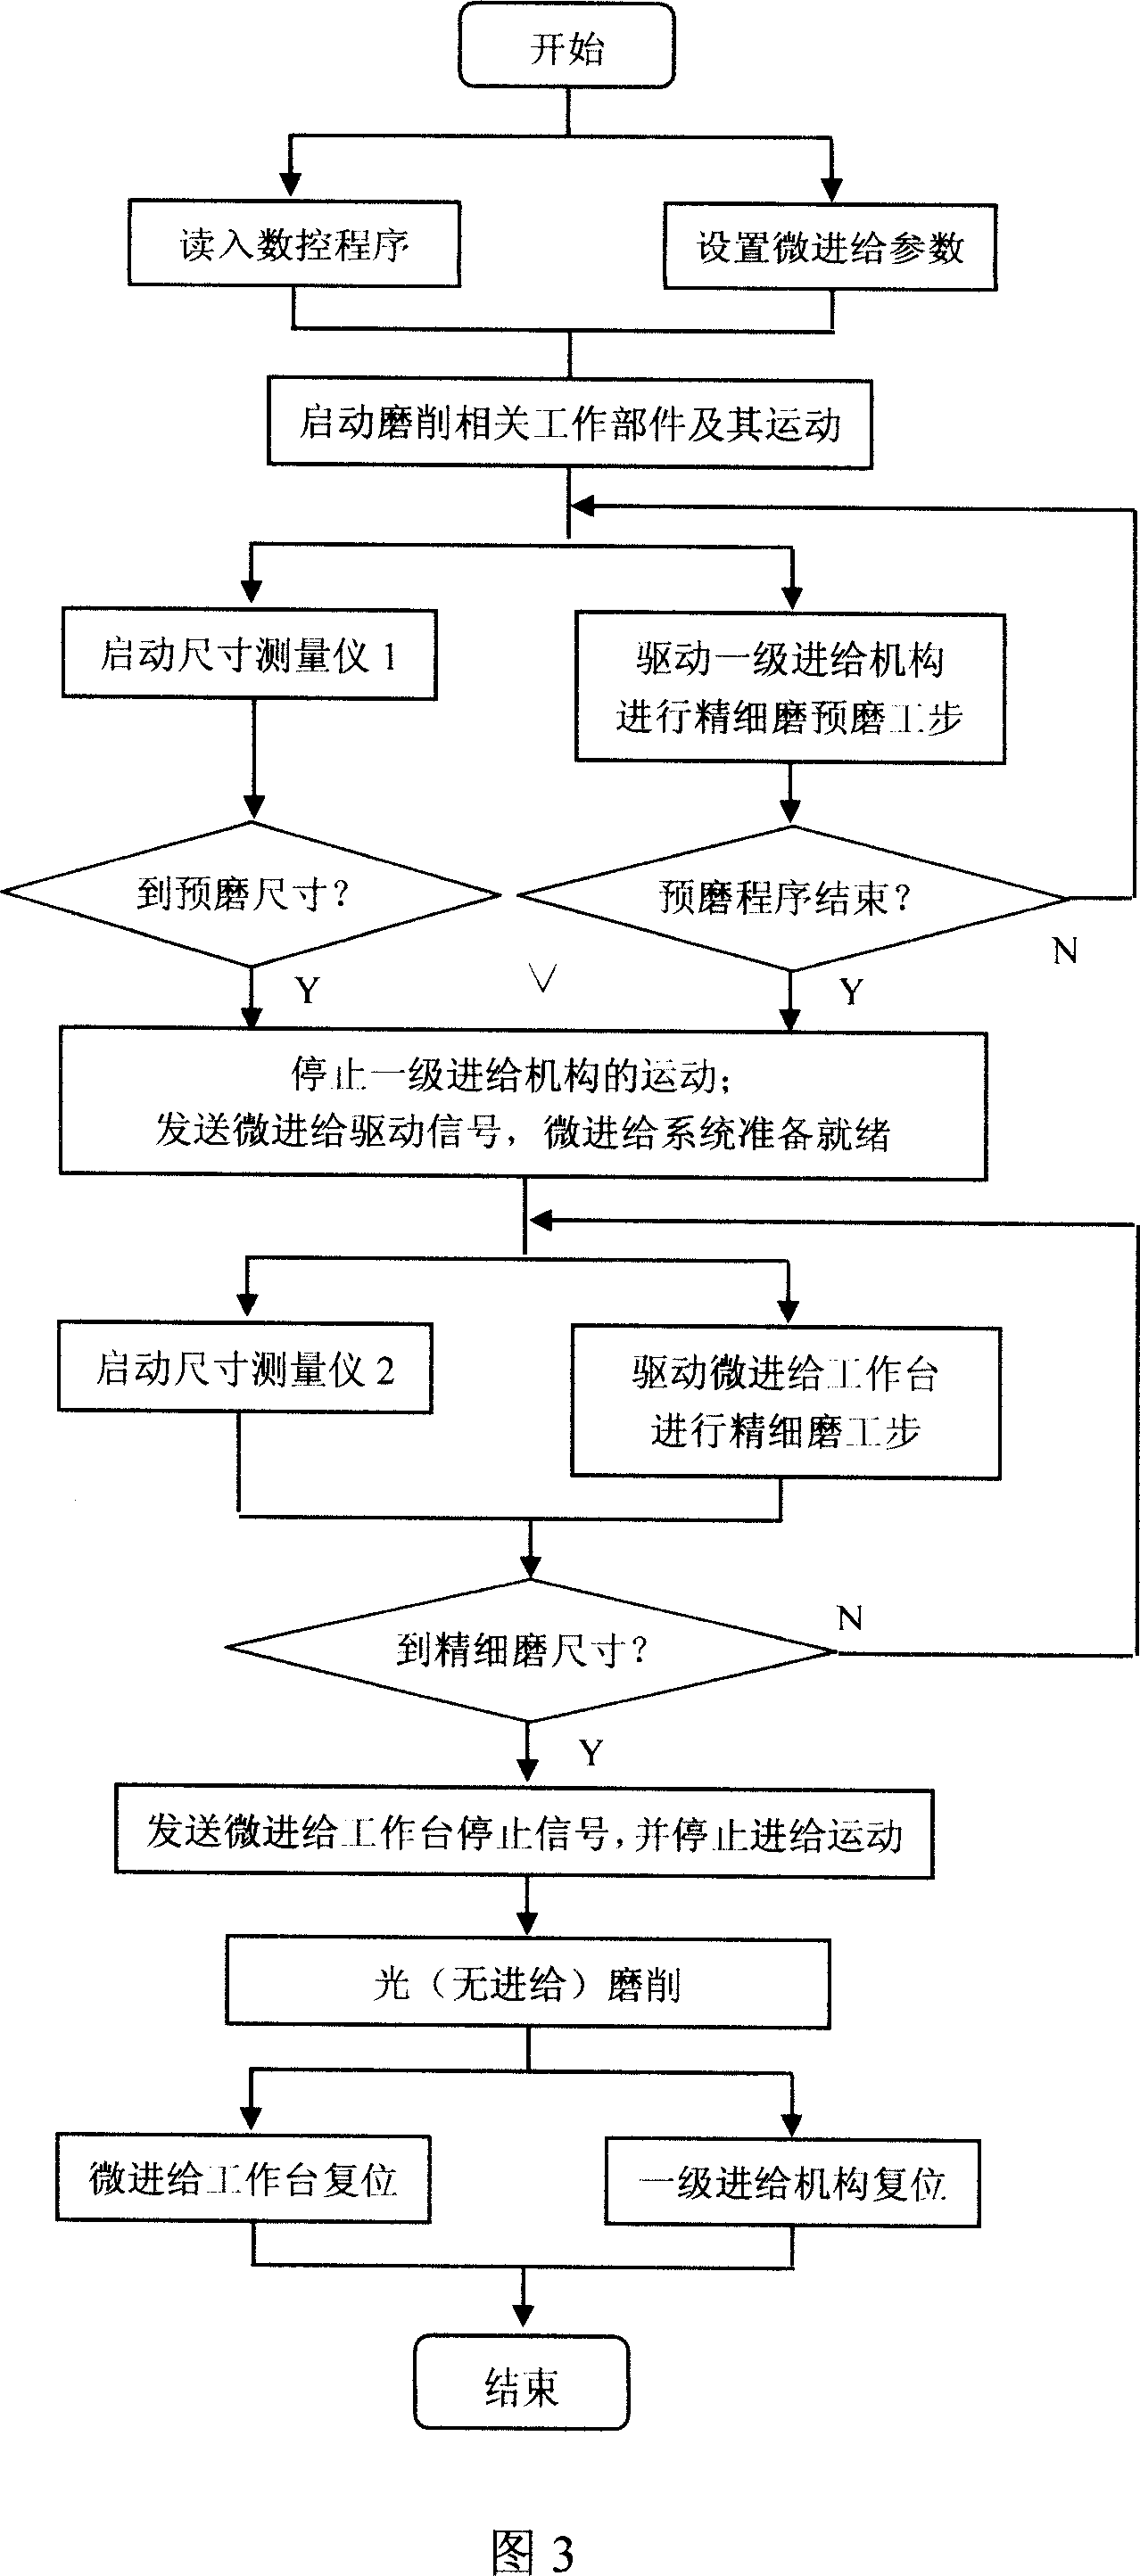
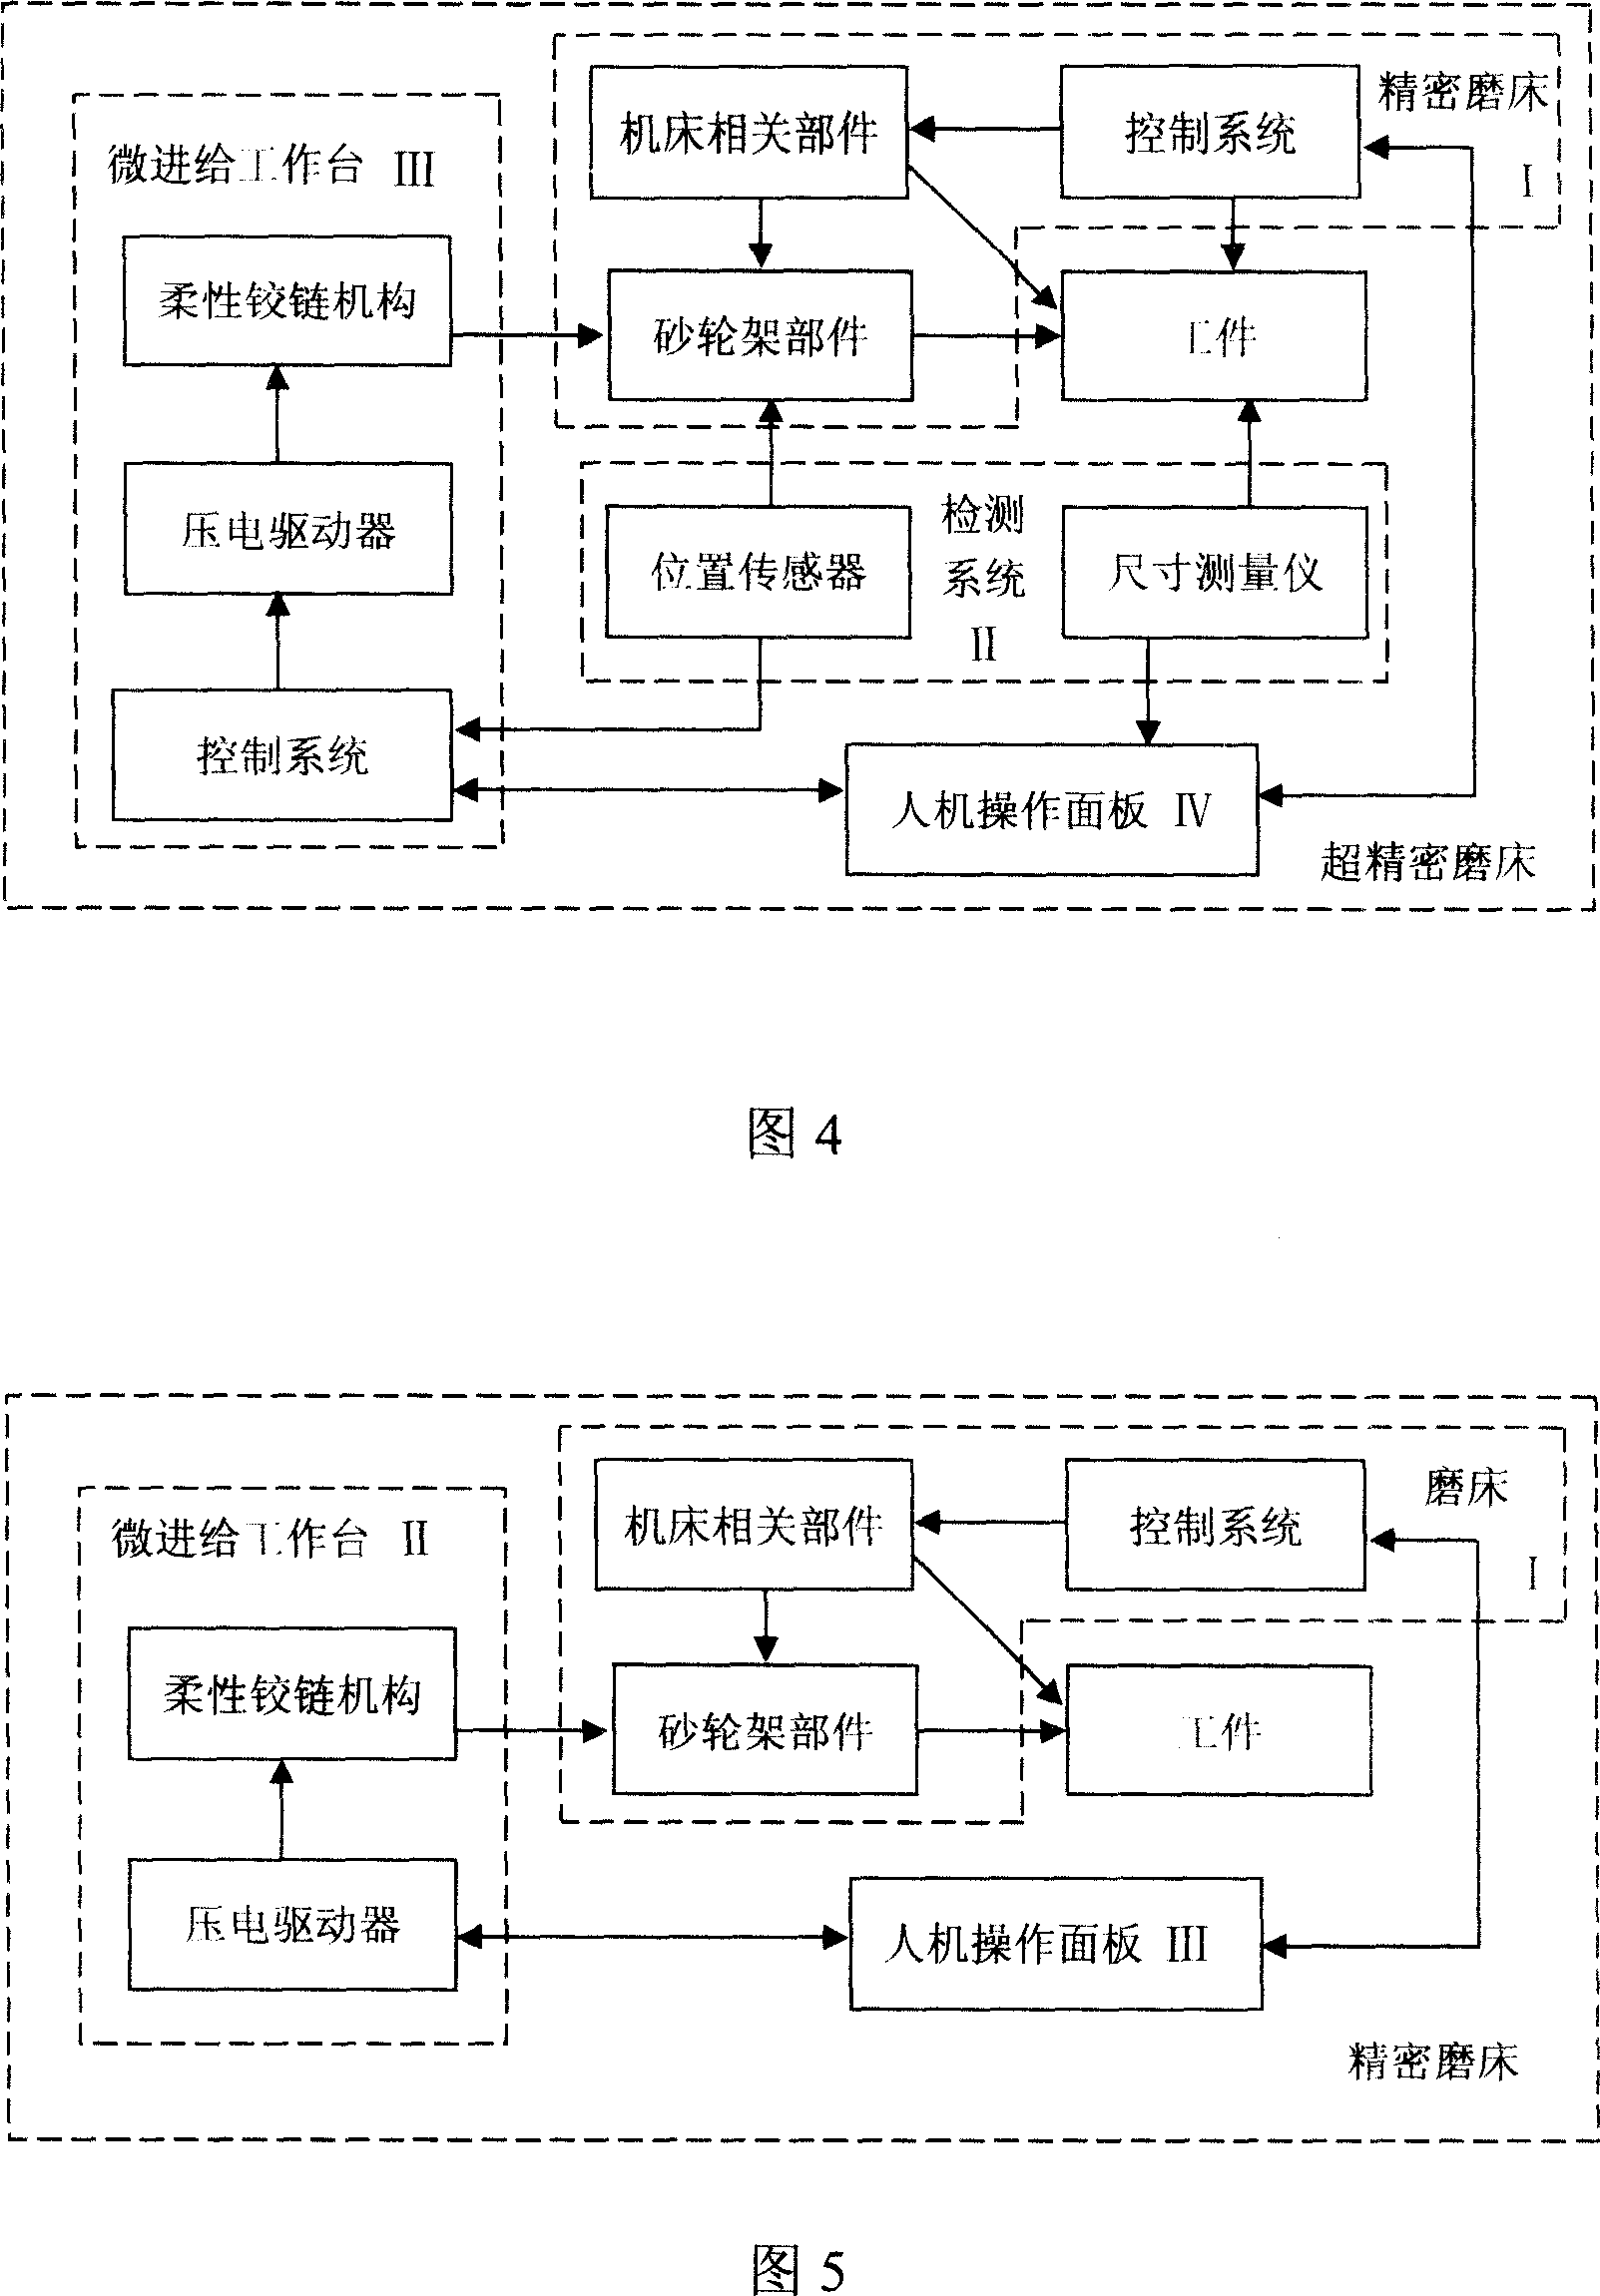
[0044] Referring to Figures 4 and 6, the minimum setting unit of the high-precision grinding machine MG1320E grinding wheel frame is 1 μm, and the diameter consistency of the processed workpiece can be obtained by using fixed-distance grinding to achieve 10 μm. Adding the size measuring instrument in the detection system II in Fig. 4 can make the diameter consistency of the workpiece to be processed be 4 μm. On the basis of the configuration of the above-mentioned high-precision grinding machine, adding the position sensor in the micro-feed workbench III and the detection system II in Fig. The operation panel IV manually coordinates and drives the rough and fine feed of the two-stage feed mechanism to complete the precision grinding and fine grinding of the workpiece. Its control method and its work flow chart are shown in Figure 6. With the cooperation of the size measuring instrument, the machining accuracy of the workpiece and the dimensional consistency of a batch of workp...
Embodiment 3
[0046] Referring to Figures 5 and 7, the minimum setting unit of the ordinary grinding machine M14320 grinding wheel frame is 5 μm. On the basis of the above-mentioned ordinary grinding machine, the micro-feed workbench II in Figure 5 is added, and the open-loop control is adopted, so that the minimum setting unit of the grinding wheel frame is 0.5 μm, and through the man-machine operation panel III, manual coordination and Drive the coarse and fine feed of the two-stage feed mechanism to complete the precision grinding and fine grinding of the workpiece. See Figure 7 for its control method and work flow chart.
[0047] Through the micro-feed table, the ultra-precision grinding machine can perform high-precision grinding of brittle and hard materials such as optical glass and ceramics with a minimum feed rate of 0.1 μm, so that optical glass can achieve mirror grinding accuracy and surface roughness, and ceramics can be thin-walled After the workpiece is ground, there will be ...
PUM
 Abstract
Description
Claims
Application Information
 - R&D
- Intellectual Property
- Life Sciences
- Materials
- Tech Scout
- Unparalleled Data Quality
- Higher Quality Content
- 60% Fewer Hallucinations
Browse by: Latest US Patents, China's latest patents, Technical Efficacy Thesaurus, Application Domain, Technology Topic, Popular Technical Reports.
© 2025 PatSnap. All rights reserved.Legal|Privacy policy|Modern Slavery Act Transparency Statement|Sitemap|About US| Contact US: help@patsnap.com


