Portuble push type track inspection car
A technology for railway tracks and inspection vehicles, which is applied to tracks, track maintenance, roads, etc. It can solve the problems of different traffic density and achieve the effects of small vibration, high measurement accuracy, and simple and reliable structural design
- Summary
- Abstract
- Description
- Claims
- Application Information
AI Technical Summary
Problems solved by technology
Method used
Image
Examples
Embodiment 1
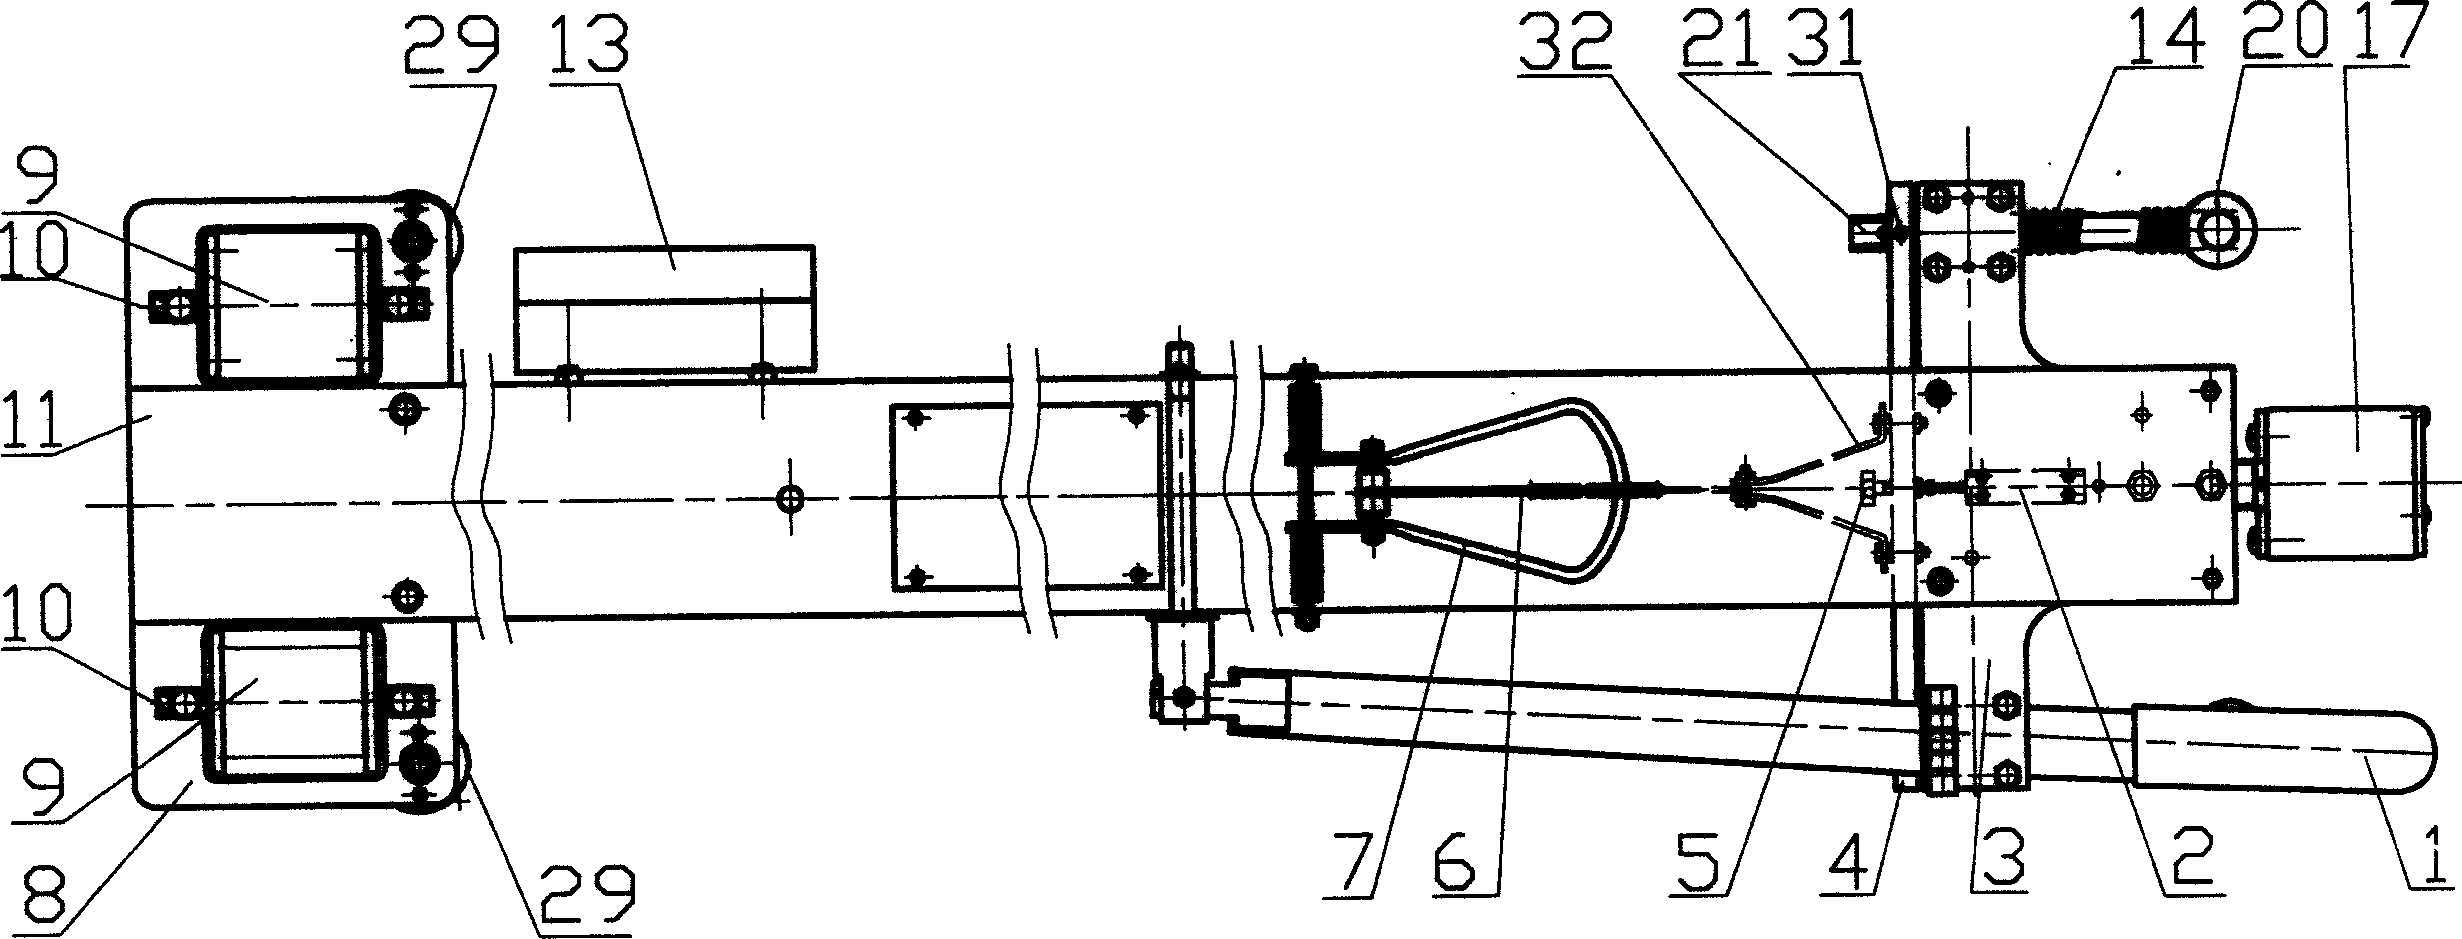
[0032] Such as figure 1 As shown, the hollow main beam 11 between the two rails 12 of the horizontal frame is the mechanism body of the inspection car, on which a supporting traveling mechanism, a tight mechanism, a hand-held push rod 1, a measuring mechanism, a control system, a power supply 28, a display Parts and various sensors, the measuring mechanism mainly includes the gauge measuring mechanism, the mileage measuring mechanism, the height difference measuring mechanism of the two tracks, the control circuit board 27 and the power supply 28 of the control system are installed inside the main girder, and the circuit of the display part Constitute display box 13 with display screen and be installed on main girder 11, main girder is the main component that straddles on two guide rails, and its length is 1464mm, and whole volume is bigger. Its weight and strength should be considered in the design, so it is very important to choose a reasonable section. On the cross-section...
Embodiment 2
[0034] Concrete structure is the same as embodiment 1, as figure 2 As shown, the present invention adopts four idler wheels, which are tightly pressed on the inner sides of the two rails respectively, and one side thereof drives the two idler wheels with two compression springs, which can flexibly compress one side of the rails as the gauge changes. At the same time, the rollers on the same side are pressed against the inner side of the other side rail, so that the verticality of the measuring trolley structure can ensure that the main girder is perpendicular to the rail, so that the measured value reflects the true gauge of the two rails. The distance between the reference wheels is also controlled relatively small, which is required to be 225mm, so the gauge value measured is the average value of the gauge between the two wheels. Therefore, the distance between the two wheels should not be too large, otherwise there will be a large deviation between the measured gauge value...
Embodiment 3
[0036] Concrete structure is the same as embodiment 2, as figure 2 As shown, the mileage measuring wheel is installed at one end, which is equivalent to a cantilever beam, and the force is not very good, so the selection of the bearing is remedied. Double-row radial ball bearings are selected, and the contact surface between the shaft and the inner ring of the bearing is widened, so that the length of the stressed part of the shaft is increased, and it is not easy to cause the shaft to vibrate. more stable.
PUM
 Abstract
Description
Claims
Application Information
 - R&D
- Intellectual Property
- Life Sciences
- Materials
- Tech Scout
- Unparalleled Data Quality
- Higher Quality Content
- 60% Fewer Hallucinations
Browse by: Latest US Patents, China's latest patents, Technical Efficacy Thesaurus, Application Domain, Technology Topic, Popular Technical Reports.
© 2025 PatSnap. All rights reserved.Legal|Privacy policy|Modern Slavery Act Transparency Statement|Sitemap|About US| Contact US: help@patsnap.com


