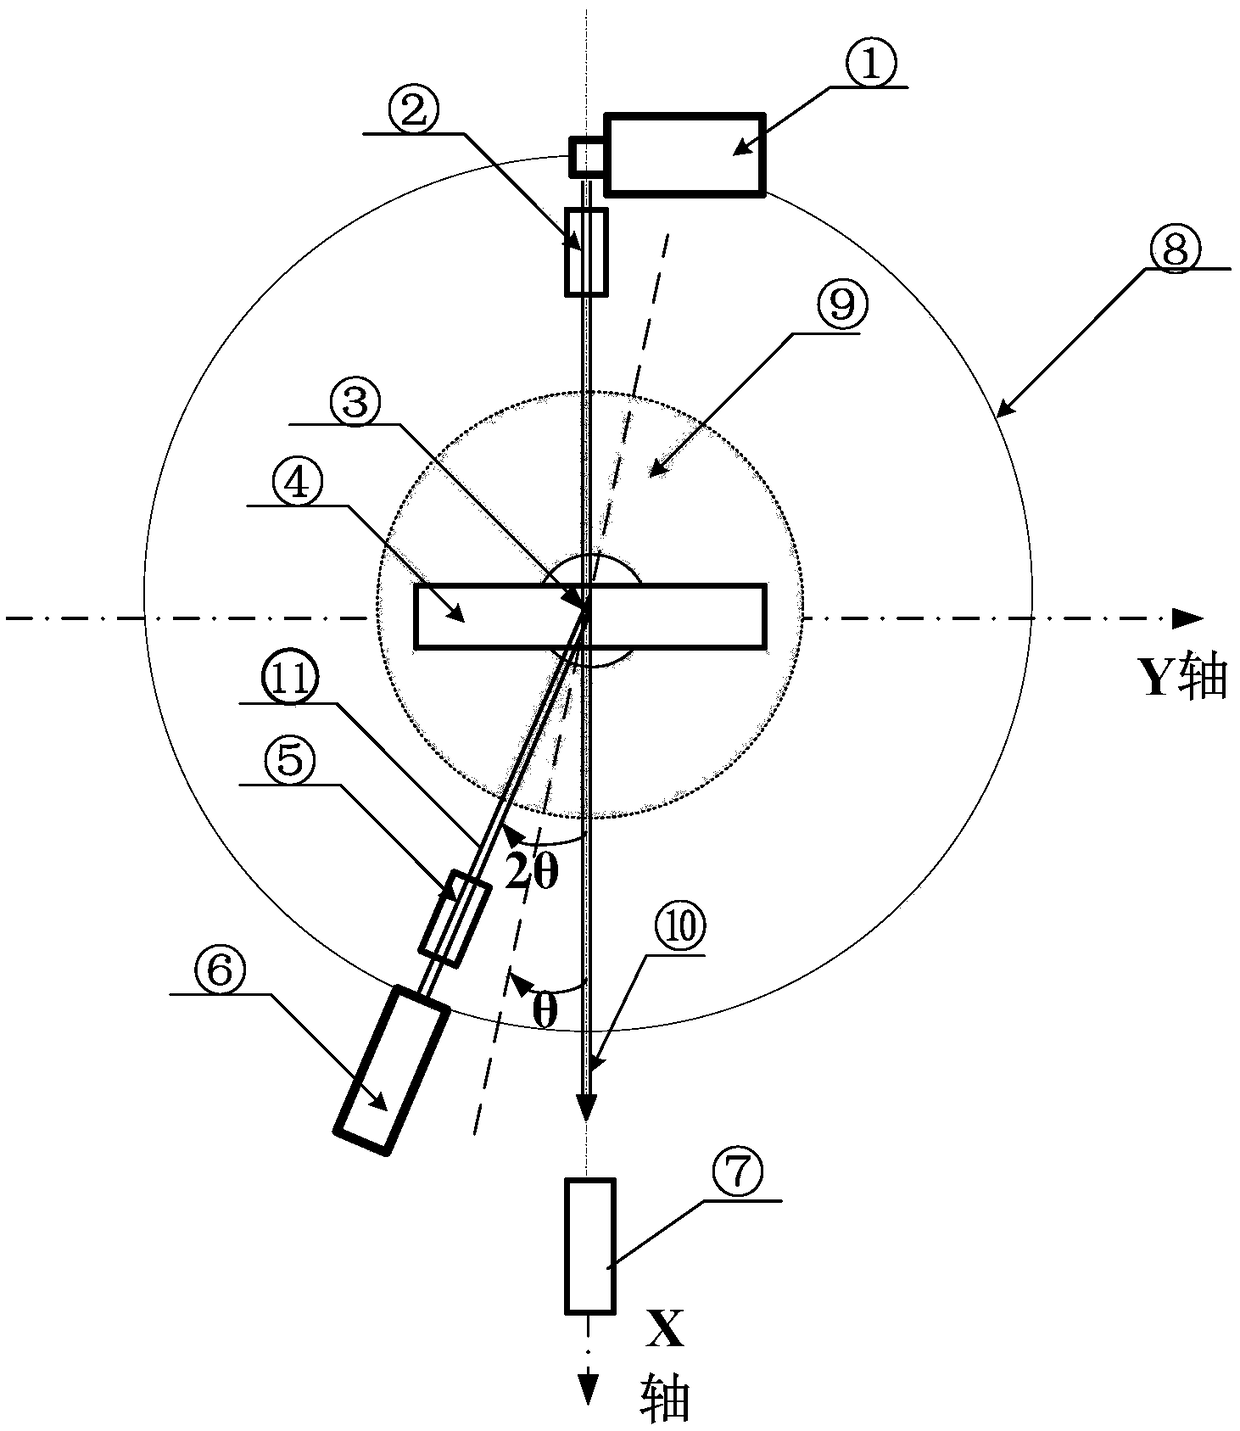
Positioning method for short wavelength X-ray diffraction testing sample
A technology for testing samples and positioning methods, which is applied in the field of X-ray diffraction detection to ensure accuracy and high precision
- Summary
- Abstract
- Description
- Claims
- Application Information
AI Technical Summary
Problems solved by technology
Method used
Image
Examples
Embodiment 1
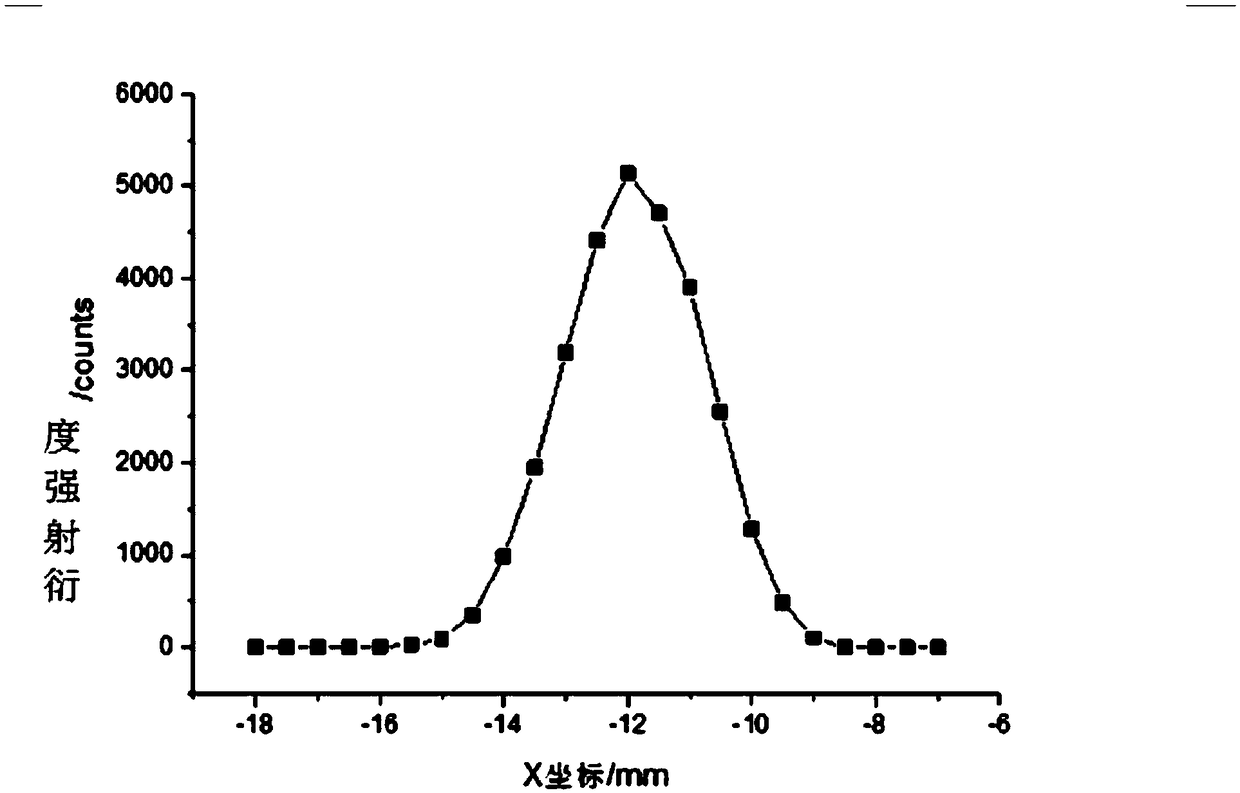
[0039] like figure 2 As shown in the figure, the measured sample is a fine-grained steel sheet of 20mm*20mm*0.5mm, and the upper and lower thresholds of the X-ray detection and analysis system of the short-wavelength X-ray diffraction instrument are set, and WKα with a wavelength of 0.0209nm is used 1 Measure the diffraction intensity and diffraction spectrum, the tube pressure is 200kv, the tube flow is 8mA, the divergence angle of the incident collimator and the receiving collimator are both 0.11°, the Y-axis and Z-axis coordinates of the reference point are positioned by the laser, and the X-axis scan is used. Measure the distribution of the transmitted short-wavelength X-ray diffraction count intensity along the thickness direction, and accurately locate the X-axis coordinates of the reference point, as follows:
[0040] Step 1: Clamp the sample on the sample stage so that the surface normal of the test part selected as the reference point is parallel to the X-ray inciden...
Embodiment 2
[0047] like Figure 4 As shown, the measured sample is a titanium alloy double-layer curved hollow sample with a wall thickness of 2 mm. The upper and lower thresholds of the X-ray detection and analysis system of the short-wavelength X-ray diffraction instrument are set, and WKα with a wavelength of 0.0209 nm is used. 1 Measure the diffraction intensity and diffraction spectrum, the tube pressure is 200kv, the tube flow is 4mA, the divergence angle of the incident collimator and the receiving collimator are both 0.11°, the Y-axis and Z-axis coordinates of the reference point are positioned by the laser, and the X-axis scan is used. Measure the distribution of the transmitted short-wavelength X-ray diffraction count intensity along the thickness direction, and accurately locate the X-axis coordinates of the reference point, as follows:
[0048] Step 1: Clamp the sample on the sample stage so that the surface normal of the test site selected as the reference point is parallel t...
Embodiment 3
[0054] like Image 6 As shown, the tested samples are hollow titanium alloy samples with different wall thicknesses, one side wall thickness is 1mm thick, the other side wall thickness is 3mm maximum, and the minimum is 1mm thick serrated sample. The sample is a sealed structure, and it is difficult to directly observe the thickness of its interior. The divergence angles of the incident collimator and the receiving collimator of the short-wavelength X-ray diffraction instrument are both 0.11°. The upper and lower thresholds of the X-ray detection and analysis system of the instrument are set and WKα with a wavelength of 0.0209nm is used. 1 When measuring the diffraction intensity and diffraction spectrum, the tube pressure is 200kv, the tube flow is 4mA, and the Z-axis coordinate of the sample reference point is positioned by the laser; the transmitted X-ray intensity distribution of the vertically incident sample is measured by direct Y-axis scanning, and the Y of the sample ...
PUM
| Property | Measurement | Unit |
|---|---|---|
| thickness | aaaaa | aaaaa |
Abstract
Description
Claims
Application Information
 - R&D
- Intellectual Property
- Life Sciences
- Materials
- Tech Scout
- Unparalleled Data Quality
- Higher Quality Content
- 60% Fewer Hallucinations
Browse by: Latest US Patents, China's latest patents, Technical Efficacy Thesaurus, Application Domain, Technology Topic, Popular Technical Reports.
© 2025 PatSnap. All rights reserved.Legal|Privacy policy|Modern Slavery Act Transparency Statement|Sitemap|About US| Contact US: help@patsnap.com


