Characteristic sample piece and method used for detecting positioning accuracy of three-axis diamond lathe
A technology of diamond lathe and positioning accuracy, applied in the direction of measuring devices, instruments, etc., can solve the problems of cumbersome detection process, large temperature influence, high environmental requirements, etc., and achieve the effect of simplifying the detection process, simplifying the detection method and detection process
- Summary
- Abstract
- Description
- Claims
- Application Information
AI Technical Summary
Problems solved by technology
Method used
Image
Examples
specific Embodiment approach 1
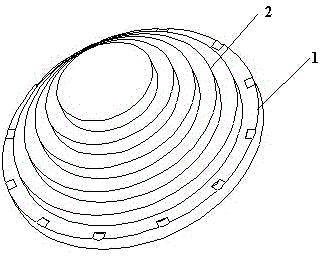
[0028] Specific Embodiment 1: This embodiment provides a method for detecting the positioning accuracy of a three-axis diamond lathe based on characteristic samples. Through theoretical derivation and analysis, it can be known that the positioning accuracy of each axis of the diamond lathe affects the surface shape error of the processed workpiece. relationship, and then according to the above relationship, design a feature sample that can accurately reflect the positioning accuracy of each axis of the machine tool, and use the three-coordinate measuring machine precision equipment to detect the processed feature sample. Through various measurement data, the diamond lathe can be reversely characterized. The positioning accuracy of each axis.
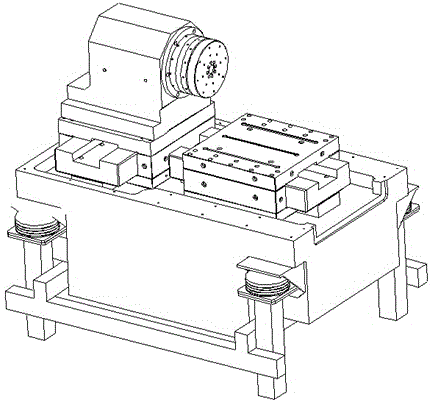
[0029] like figure 1 As shown, the specific implementation steps are as follows:
[0030] 1. Use a diamond lathe to process feature samples. A three-axis diamond lathe with a T-shaped layout such as figure 1 As shown, the X and Z line...
specific Embodiment approach 2
[0037] Specific embodiment two: This embodiment provides a method for detecting the positioning accuracy of a three-axis diamond lathe based on characteristic samples, and the specific steps are as follows:
[0038] 1. Use a diamond lathe to process feature samples.
[0039] 2. During the machining process, when machining the outer cylindrical surface, only the Z axis needs to be fed linearly, and the other two axes remain stationary; when machining steps and end planes, only the X axis is required to be fed linearly, and the other two axes remain stationary.
[0040] 3. Use a three-coordinate measuring machine for axial height measurement. Assuming that the height of each step in the axial direction is a, take the top end of the base as the measurement reference point, measure the height difference between the top end of each step and the measurement reference point, repeat the measurement 5 times in both positive and negative directions, and record the results According to ...
PUM
 Abstract
Description
Claims
Application Information
 - R&D
- Intellectual Property
- Life Sciences
- Materials
- Tech Scout
- Unparalleled Data Quality
- Higher Quality Content
- 60% Fewer Hallucinations
Browse by: Latest US Patents, China's latest patents, Technical Efficacy Thesaurus, Application Domain, Technology Topic, Popular Technical Reports.
© 2025 PatSnap. All rights reserved.Legal|Privacy policy|Modern Slavery Act Transparency Statement|Sitemap|About US| Contact US: help@patsnap.com


