Nondestructive inspection method and device for internal defect of workpieces by x-ray diffraction x scan
A technology for internal defect, non-destructive testing, applied in measurement devices, material analysis using radiation, material analysis using wave/particle radiation, etc., can solve problems such as time-consuming and impractical
- Summary
- Abstract
- Description
- Claims
- Application Information
AI Technical Summary
Problems solved by technology
Method used
Image
Examples
Embodiment 1
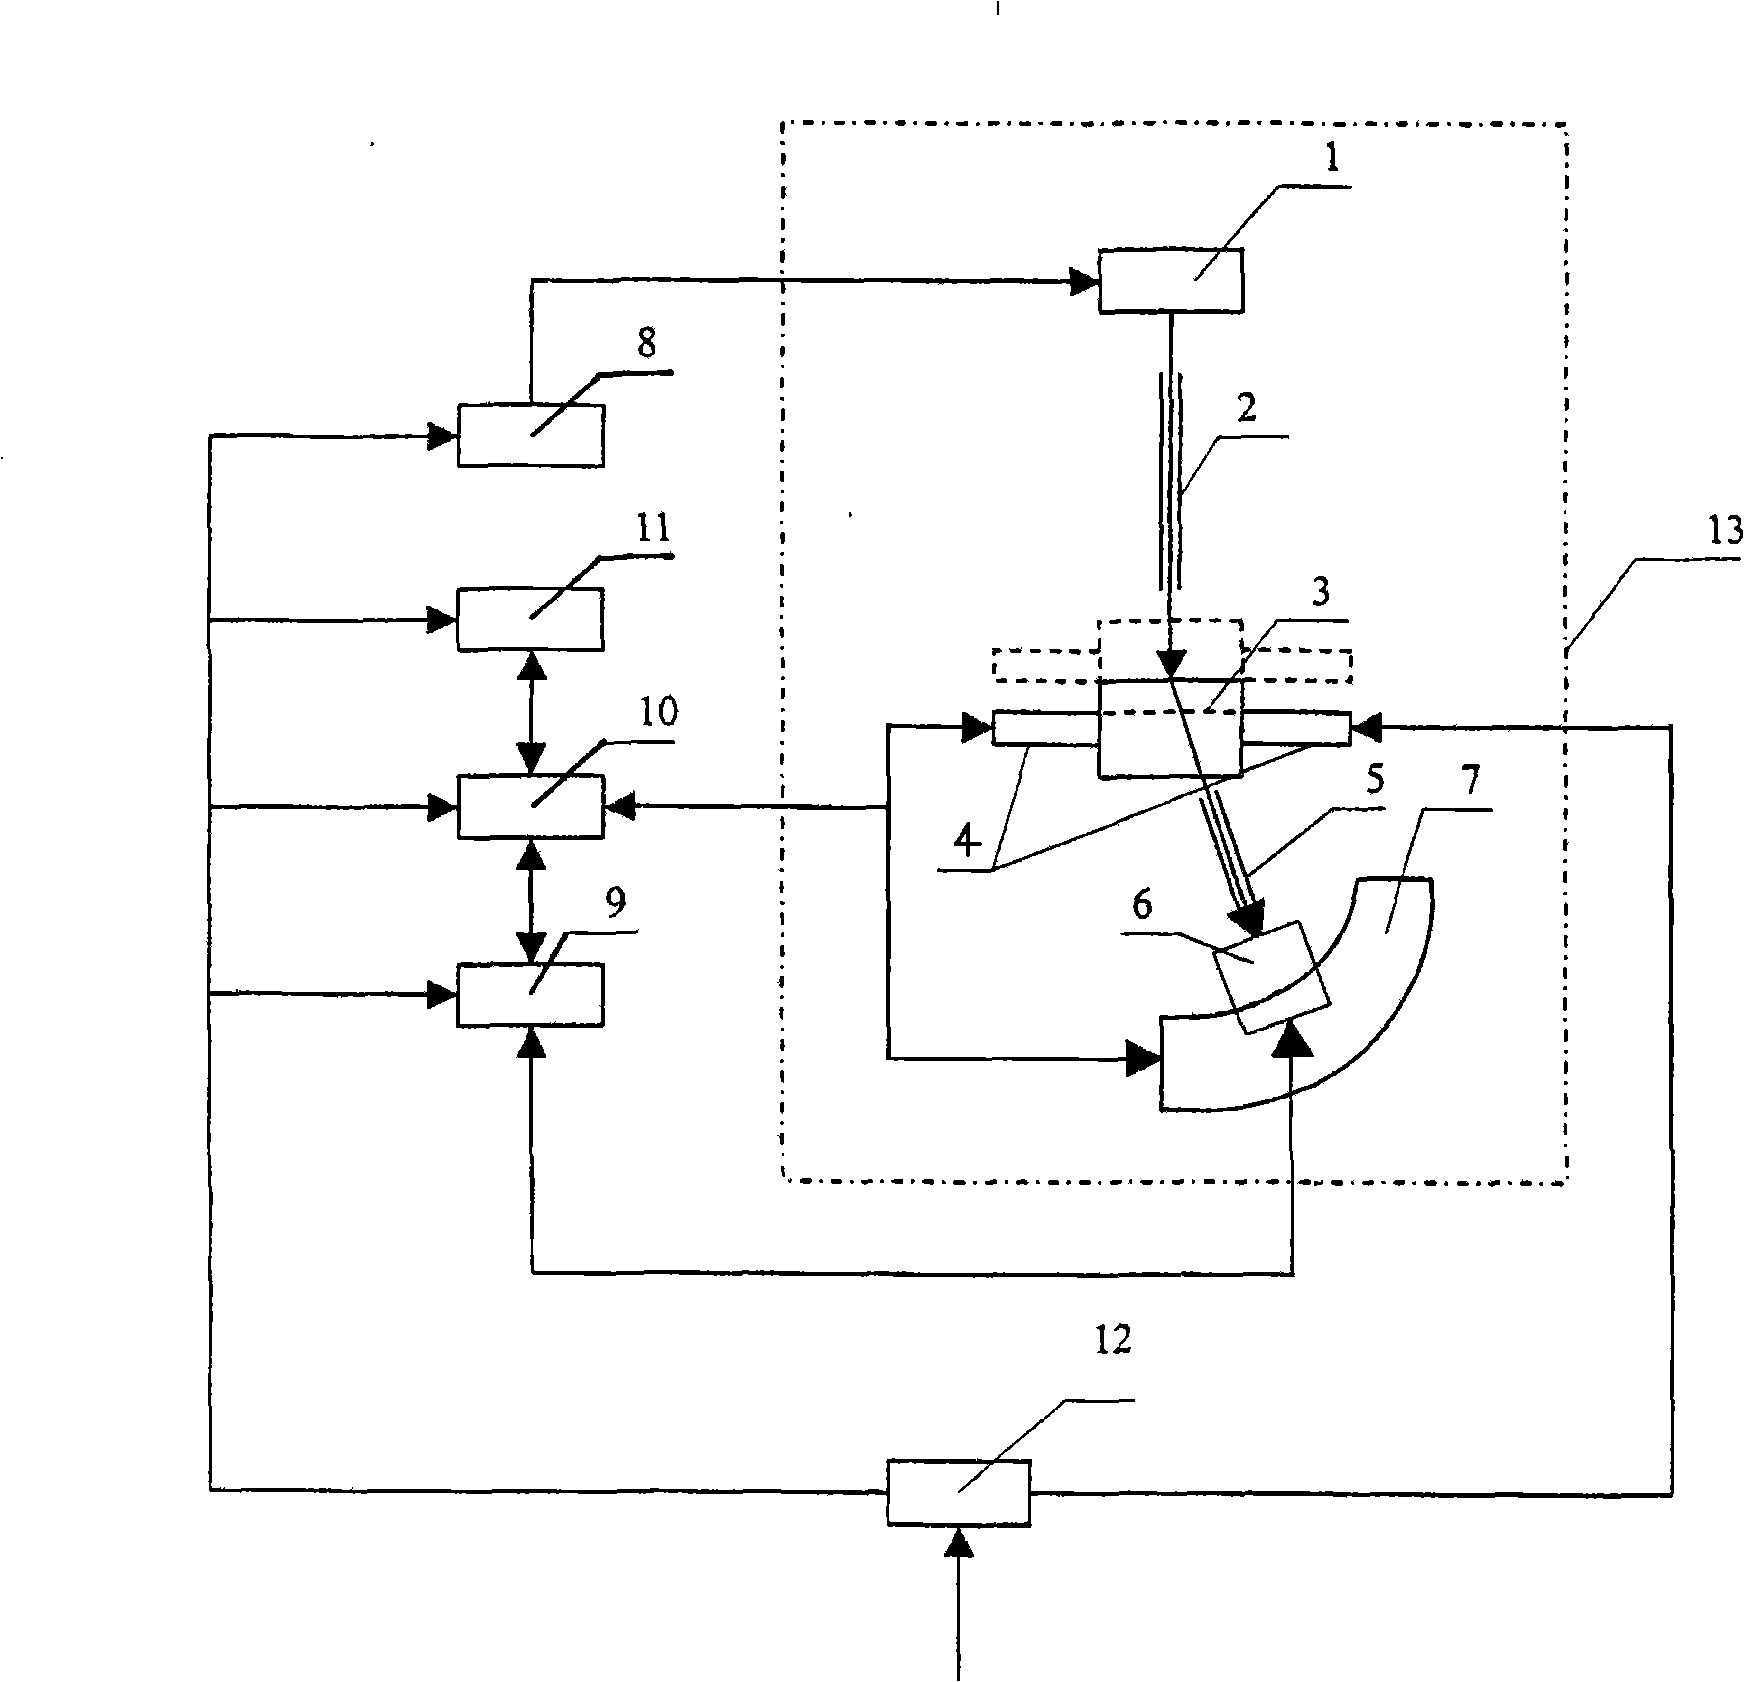
[0060] Embodiment 1: see attached figure 1 , an X-ray diffraction scanning device for non-destructively detecting internal defects of a workpiece, comprising an X-ray source 1, an incident collimator 2, a three-dimensional displacement platform 4, a parallel limit receiving collimator 5, a detector 6, a goniometer 7, X-ray source controller 8, multi-channel energy analyzer 9, computer 10; it is characterized in that: the corresponding detection unit of described detector / detector array 6 is placed in the X-ray diffraction beam that it receives and incident to the measured The included angle of the incident X-ray beam of the workpiece is the diffraction angle 2θ hkl ; where, the diffraction angle 2θ hkl It is equal to the diffraction angle corresponding to the diffraction peak of a certain crystal material (hkl) crystal plane of the measured workpiece, which satisfies the Bragg equation 2dhklSinθ hkl = lambda , where d hkl is the distance between (hkl) crystal planes, lam...
Embodiment 2
[0068] Embodiment 2: see attached figure 1 , the method and device adopted in this example are basically the same as in Example 1, except that the focal spot of the tungsten target is 1mm×1mm, the tube voltage is 200KV, and the tube current is 2mA. The step-by-step measurement of diffraction intensity time is 10 seconds, y=6~33mm, Δy=0.2mm).
[0069] The workpiece to be tested is an image quality meter inserted in the middle of a 25mm thick compressed aluminum powder sample. The image quality meter has 5 steel needles with different diameters, and the distance between the 5 steel needles is about 5mm. Among them, the diameter of the thinnest steel needle is 0.2 mm.
[0070] Fig. 8 is the X-ray diffraction one-dimensional scanning non-destructive testing results of an image quality meter inserted in the middle of a 25mm thick compacted aluminum powder sample, in which the five concave parts of the test curve (that is, the minimum values of the five diffraction count intensi...
Embodiment 3
[0071] Embodiment 3: see attached figure 1 , The method and device used in this example are basically the same as those in Example 1, except that the multi-channel energy analyzer is replaced by a single-channel energy analyzer, and the upper and lower thresholds are set, and only the Kα characteristic X-ray diffraction line of tungsten is accepted.
PUM
| Property | Measurement | Unit |
|---|---|---|
| Width | aaaaa | aaaaa |
| Divergence angle | aaaaa | aaaaa |
| Width | aaaaa | aaaaa |
Abstract
Description
Claims
Application Information
 - R&D
- Intellectual Property
- Life Sciences
- Materials
- Tech Scout
- Unparalleled Data Quality
- Higher Quality Content
- 60% Fewer Hallucinations
Browse by: Latest US Patents, China's latest patents, Technical Efficacy Thesaurus, Application Domain, Technology Topic, Popular Technical Reports.
© 2025 PatSnap. All rights reserved.Legal|Privacy policy|Modern Slavery Act Transparency Statement|Sitemap|About US| Contact US: help@patsnap.com


