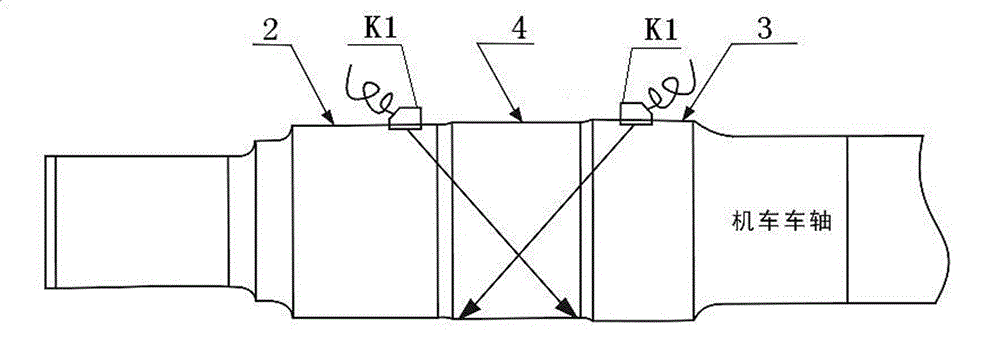
Ultrasonic flaw detection method of gear press-in section of locomotive axle
An ultrasonic and axle technology, which is applied in the analysis of solids using sound waves/ultrasonic waves/infrasonic waves, material analysis using sound waves/ultrasonic waves/infrasonic waves, and measuring devices. It can solve problems such as no other adjustments, and achieve great practicality and feasibility. sexual effect
- Summary
- Abstract
- Description
- Claims
- Application Information
AI Technical Summary
Problems solved by technology
Method used
Image
Examples
Embodiment 1
[0015] Such as image 3 As shown, using the comparison test blocks of DF8B (integral) and SS3B locomotive integral wheels, the ultrasonic flaw detection sensitivity of the inner and outer sides of the tested DF8B (semi-suspension) axle gear press-fitting part 4 is adjusted respectively.
[0016] (1) Place the 2.5P13×13 axis shear-wave oblique probe K1 on the wheel seat 2 of the tooth end of the DF8B (overall) comparison test block, adjust the relevant buttons and parameters of the ultrasonic flaw detector, and scan the inner side of the gear press-fitting part 4 650- 1 artificial crack, adjust the amplitude of the best reflected echo to 80% of the vertical full range, and use it as the ultrasonic flaw detection sensitivity inside the gear press-fitting part of the DF8B (semi-suspended) axle, as shown in image 3 (A) shown.
[0017] (2) Put the 2.5P13×13-axis shear-wave oblique probe K1 on the gear pressing part 4 of the SS3B (integral) type comparison test block, adjust the r...
Embodiment 2
[0019] Such as Figure 4 As shown, the ultrasonic flaw detection sensitivity at the inside and outside of the detected SS6B (whole) axle gear pressing part 4 is adjusted by using the comparison test block of the SS3B (whole) locomotive.
[0020] (1) Place the 2.5P13×13-axis shear-wave oblique probe K1 on the wheel seat 2 of the SS3B (integer) type comparison test block, adjust the relevant buttons and parameters of the ultrasonic flaw detector, and scan the inner side of the gear press-fitting part 4 640- 1 artificial crack, the best reflected echo amplitude is adjusted to 80% of the vertical full range, which is used as the ultrasonic flaw detection sensitivity inside the gear press-fitting part 4 of the SS6B (whole) axle, as shown in Figure 4 (A) shown.
[0021] (2) Place the 2.5P13×13-axis shear-wave oblique probe K1 on the gear press-fitting part 4 of the SS3B-type comparison test block, adjust the relevant buttons and parameters of the ultrasonic flaw detector, and dete...
Embodiment 3
[0023] Such as figure 2 As shown, the ultrasonic flaw detection sensitivity of the tested 8K axle gear pressing part 4 is adjusted by using the comparison test block of the SS7C locomotive.
[0024] Place the 2.5P13×13-axis shear-wave oblique probe K1 on the wheel seat 2 of the tooth end of the SS7C-type comparison test block, adjust the relevant buttons and parameters of the ultrasonic flaw detector, and scan the artificial crack 640-1 inside the gear press-fitting part 4, Adjust the highest reflected wave amplitude to 80% of the vertical full scale, which can be used as the ultrasonic flaw detection sensitivity of the gear press-fitting part 4 of the 8K axle. When the shear wave detects the axle gear seat, the detection is carried out on the wheel seat 2 and the bearing seat 3 respectively.
PUM
 Abstract
Description
Claims
Application Information
 - R&D
- Intellectual Property
- Life Sciences
- Materials
- Tech Scout
- Unparalleled Data Quality
- Higher Quality Content
- 60% Fewer Hallucinations
Browse by: Latest US Patents, China's latest patents, Technical Efficacy Thesaurus, Application Domain, Technology Topic, Popular Technical Reports.
© 2025 PatSnap. All rights reserved.Legal|Privacy policy|Modern Slavery Act Transparency Statement|Sitemap|About US| Contact US: help@patsnap.com


